Products, Events & Audiences
The Developer Guide has an in-depth article covering events, their types and the features they enable.
As a small taste, you're gonna fire an event when a user adds a product to cart. This is a standard and important stage in the e-commerce conversion funnel, and thus Dynamic Yield needs to recognize it as such - rather than as some proprietary event whose details are opaque to us. Hence, there is a specific schema to follow when firing this event.
One debt we have from before is uploading the product feed into Dynamic Yield, so that given an event specifying a SKU, the system would be able to fetch all there is to know about it.
After the event is set up, we will use it to create an audience: a user segment based on user activity up to a long way back.
Then, in the next step of the tutorial we will use this audience for targeting: instead of a simple A/B test, our hero banner campaign would show a variation tailored for that audience.
Uploading the Product Feed
Go to Assets > Data Feeds and click New Feed. A cool overlay opens, detailing the different types of feeds you can sync with us. Choose the first one: Product Feed.
In production, feeds are usually synced by providing us with a URL or SFTP credentials from which we periodically pull the latest feed. There's also a dedicated API for pushing incremental updates quickly. In our case though, we'll simply do a one-time upload of the file feed/products.json we have.
Click the little upload to cloud icon, select that local file, and in a few seconds the upload should complete.

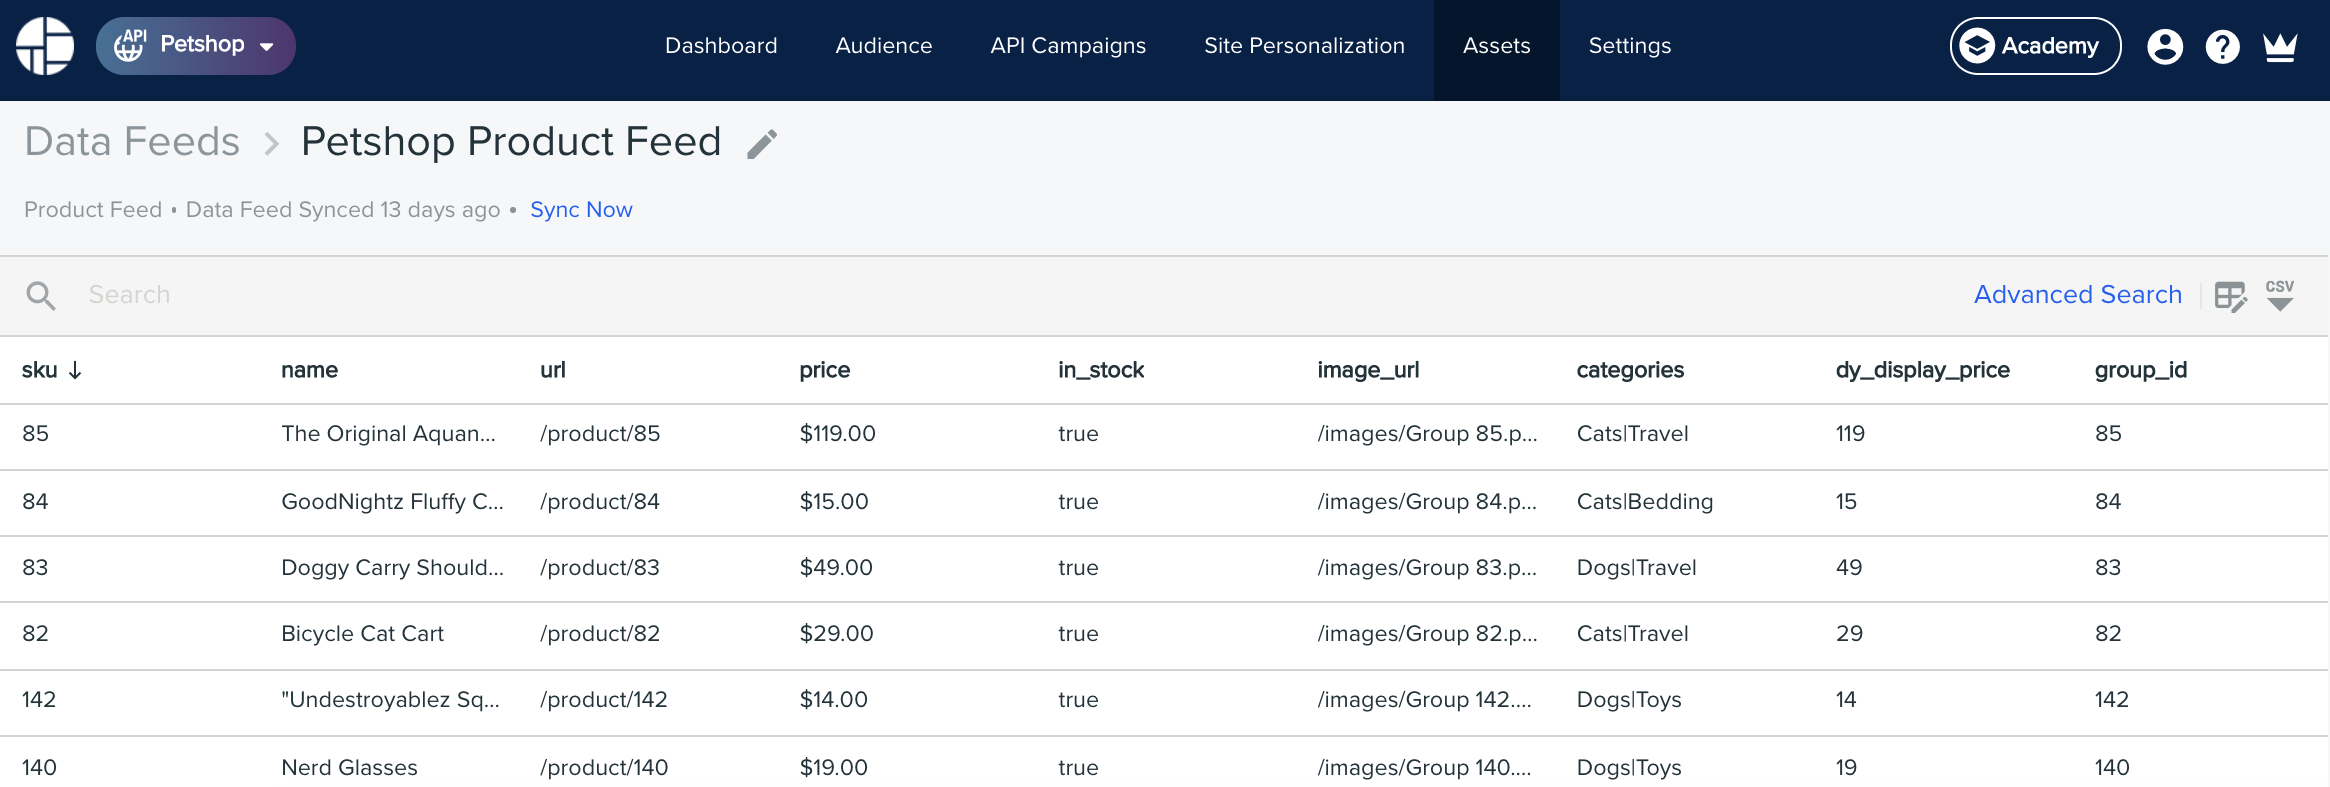
You can now click Preview to see a table of all products (total of 24) and their attributes. To finish the process hit Save and Activate.
We’re now taken to the list of data feeds, and before we can proceed, we should wait until the feed is fully synced. Wait till the Last Successful Sync field shows the current date, and Entries shows the number of products. This normally takes a few minutes.

Using the eye icon to view the feed contents, you should see all products listed.

Now that Dynamic Yield knows all about our SKUs, let's move on.
Firing the "Add to Cart" Event
In the Petshop app, products are added to cart the common way: through the product page (known as PDP in e-commerce jargon).
The server-side handler for managing the product page is in routes/product.js. Within this module, look for the function router.post('/add', (req, res) => { ... responsible for adding to cart. This is where we'll fire an event to Dynamic Yield.
First, however, let's add another helper function to DYAPI.js:
// At the bottom of the file: add this function and update the exports statement
async function reportEvent(userId, sessionId, event) {
  try {
    const options = {
      method: 'POST',
      url: `${DYHOST}/v2/collect/user/event`,
      headers: {
        'DY-API-Key': APIKEY,
      },
      body: {
        user: {
          id: userId,
        },
      	session: {
          custom: sessionId,
      	},
        events: [event],
      },
      json: true
    };
    const response = await request(options);
    console.log("Event reported: " + JSON.stringify(event));
  } catch (e) {
    console.error(`ERROR IN EVENT: ${e.message}`);
  }
}

module.exports = {
  choose,
  reportClick,
  reportEvent,
};
Now, go back to routes/product.js, and add a call to this helper function within the existing handler. Don't forget to add the needed require at the top of this file!
// 1. Add this require line at top of file
const DYAPI = require('../DYAPI');

// ...

router.post('/add', (req, res) => {
  const { sku, qty, price } = req.body;
  // ...

  /* 2. Add this, just before res.json() ends the flow */
  const addToCartEvent = {
    name: 'Add to Cart',
    properties: {
      dyType: 'add-to-cart-v1',
      value: price,
      productId: sku,
      quantity: qty,
    },
  };

  DYAPI.reportEvent(req.userId, req.sessionId, addToCartEvent);
  /* End of added code */

  res.json({
    success: true,
  // ...
There are two important details to note in the above code:
-
The event has both a name and a dyType attribute. While the display name is useful for users of the Dynamic Yield Web UI, it is the schema (dyType) that marks this event to be specially ingested by Dynamic Yield. The display name could really be anything.
-
** The productId (commonly known as SKU) should be in exactly the same format as it appears in the product feed** you've uploaded, and within the context object passed to the
/chooseendpoint. Otherwise, multiple features which rely on fetching product attributes from the feed by this SKU will not work properly.
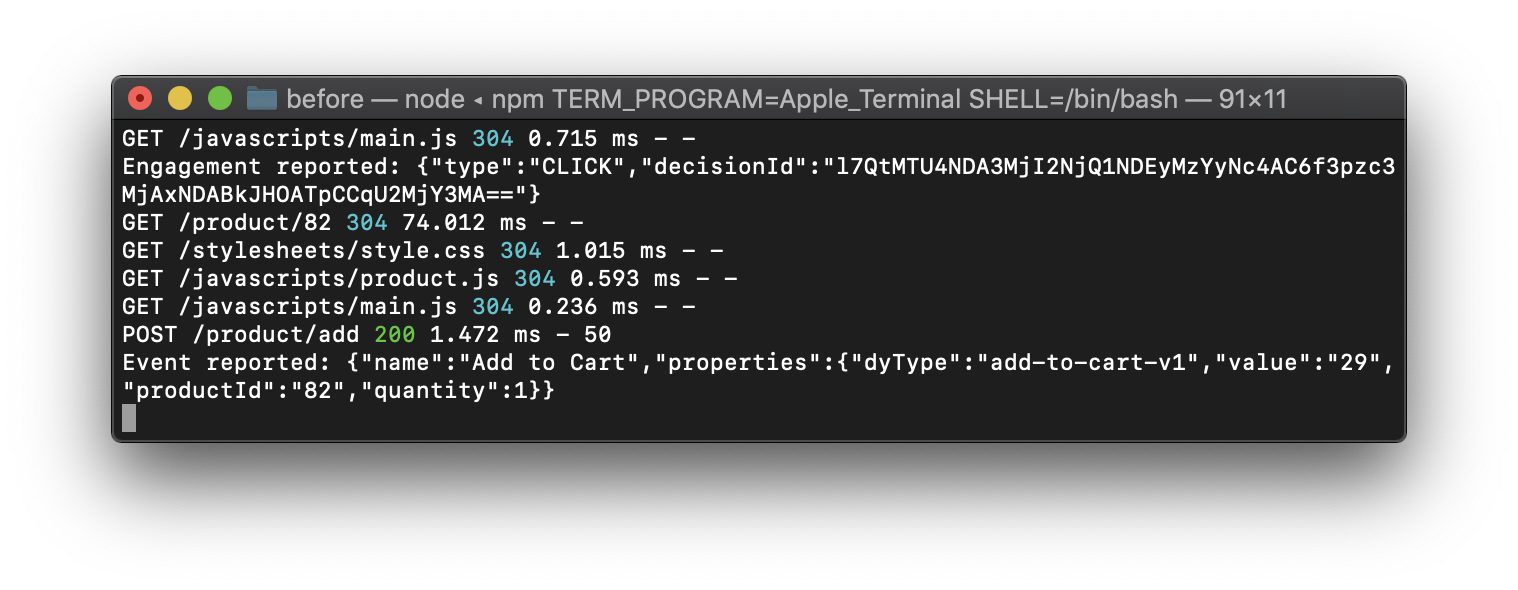
Now that we've added the needed code, let's test it. From the homepage, clicking on the banner would take you into a product listing page. Then, click on any product to add it to cart. You should see a console log message similar to this:

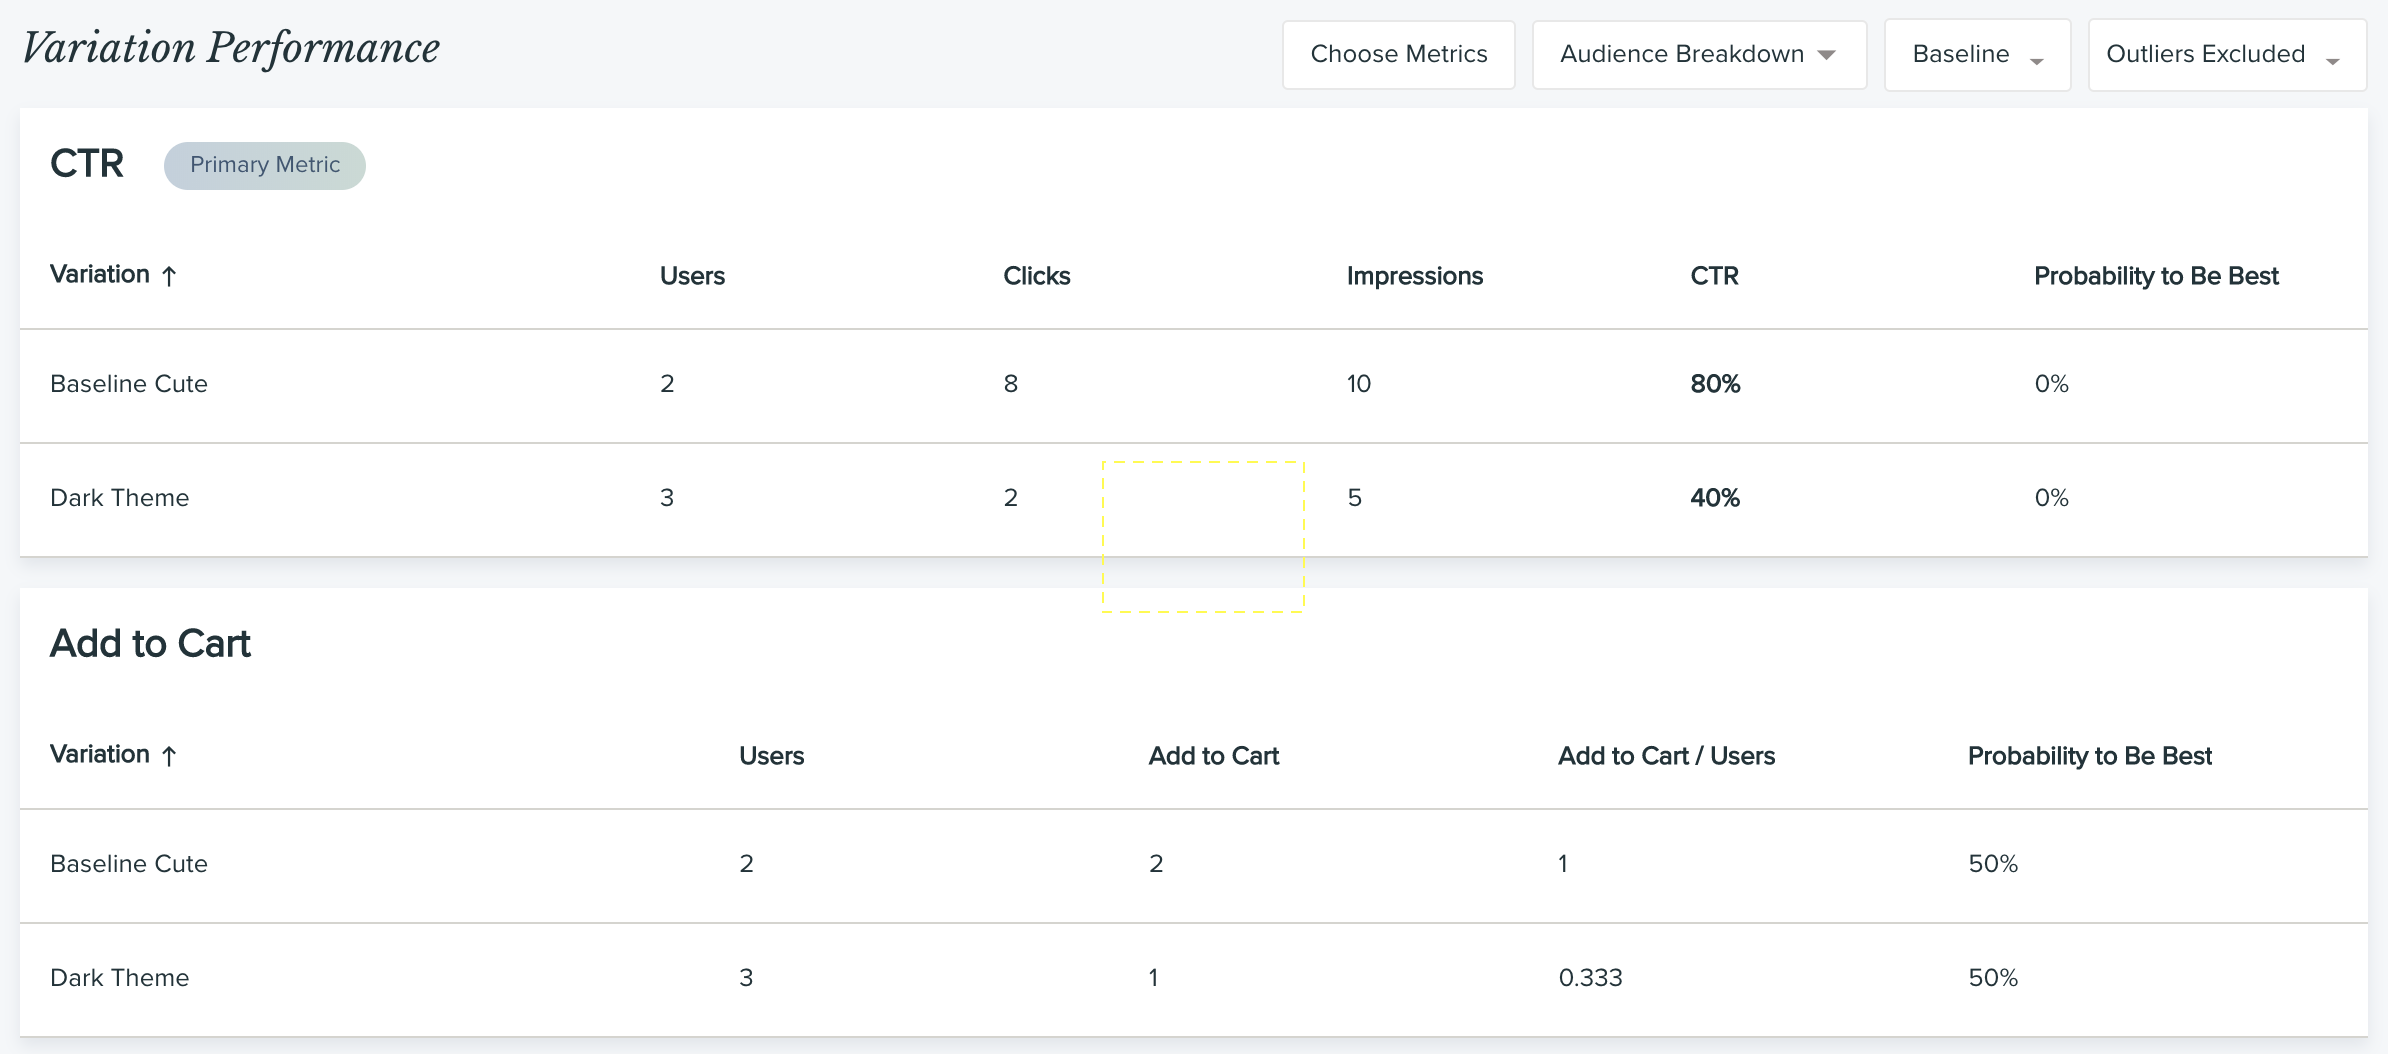
Since all visitors going through the homepage are attributed to the Hero Banner campaign, let's have a look again in its report, as we did in the previous step.
By default, the report details only the Primary Metric (which we've set to CTR) and a few other default secondary metrics - most notably purchases which we haven't handled yet. However, by clicking on the Choose Metrics button you can customize which secondary metrics to show. Add the Add to Cart metric to the display to see that events has been successfully attributed to the experience.

Building an Audience
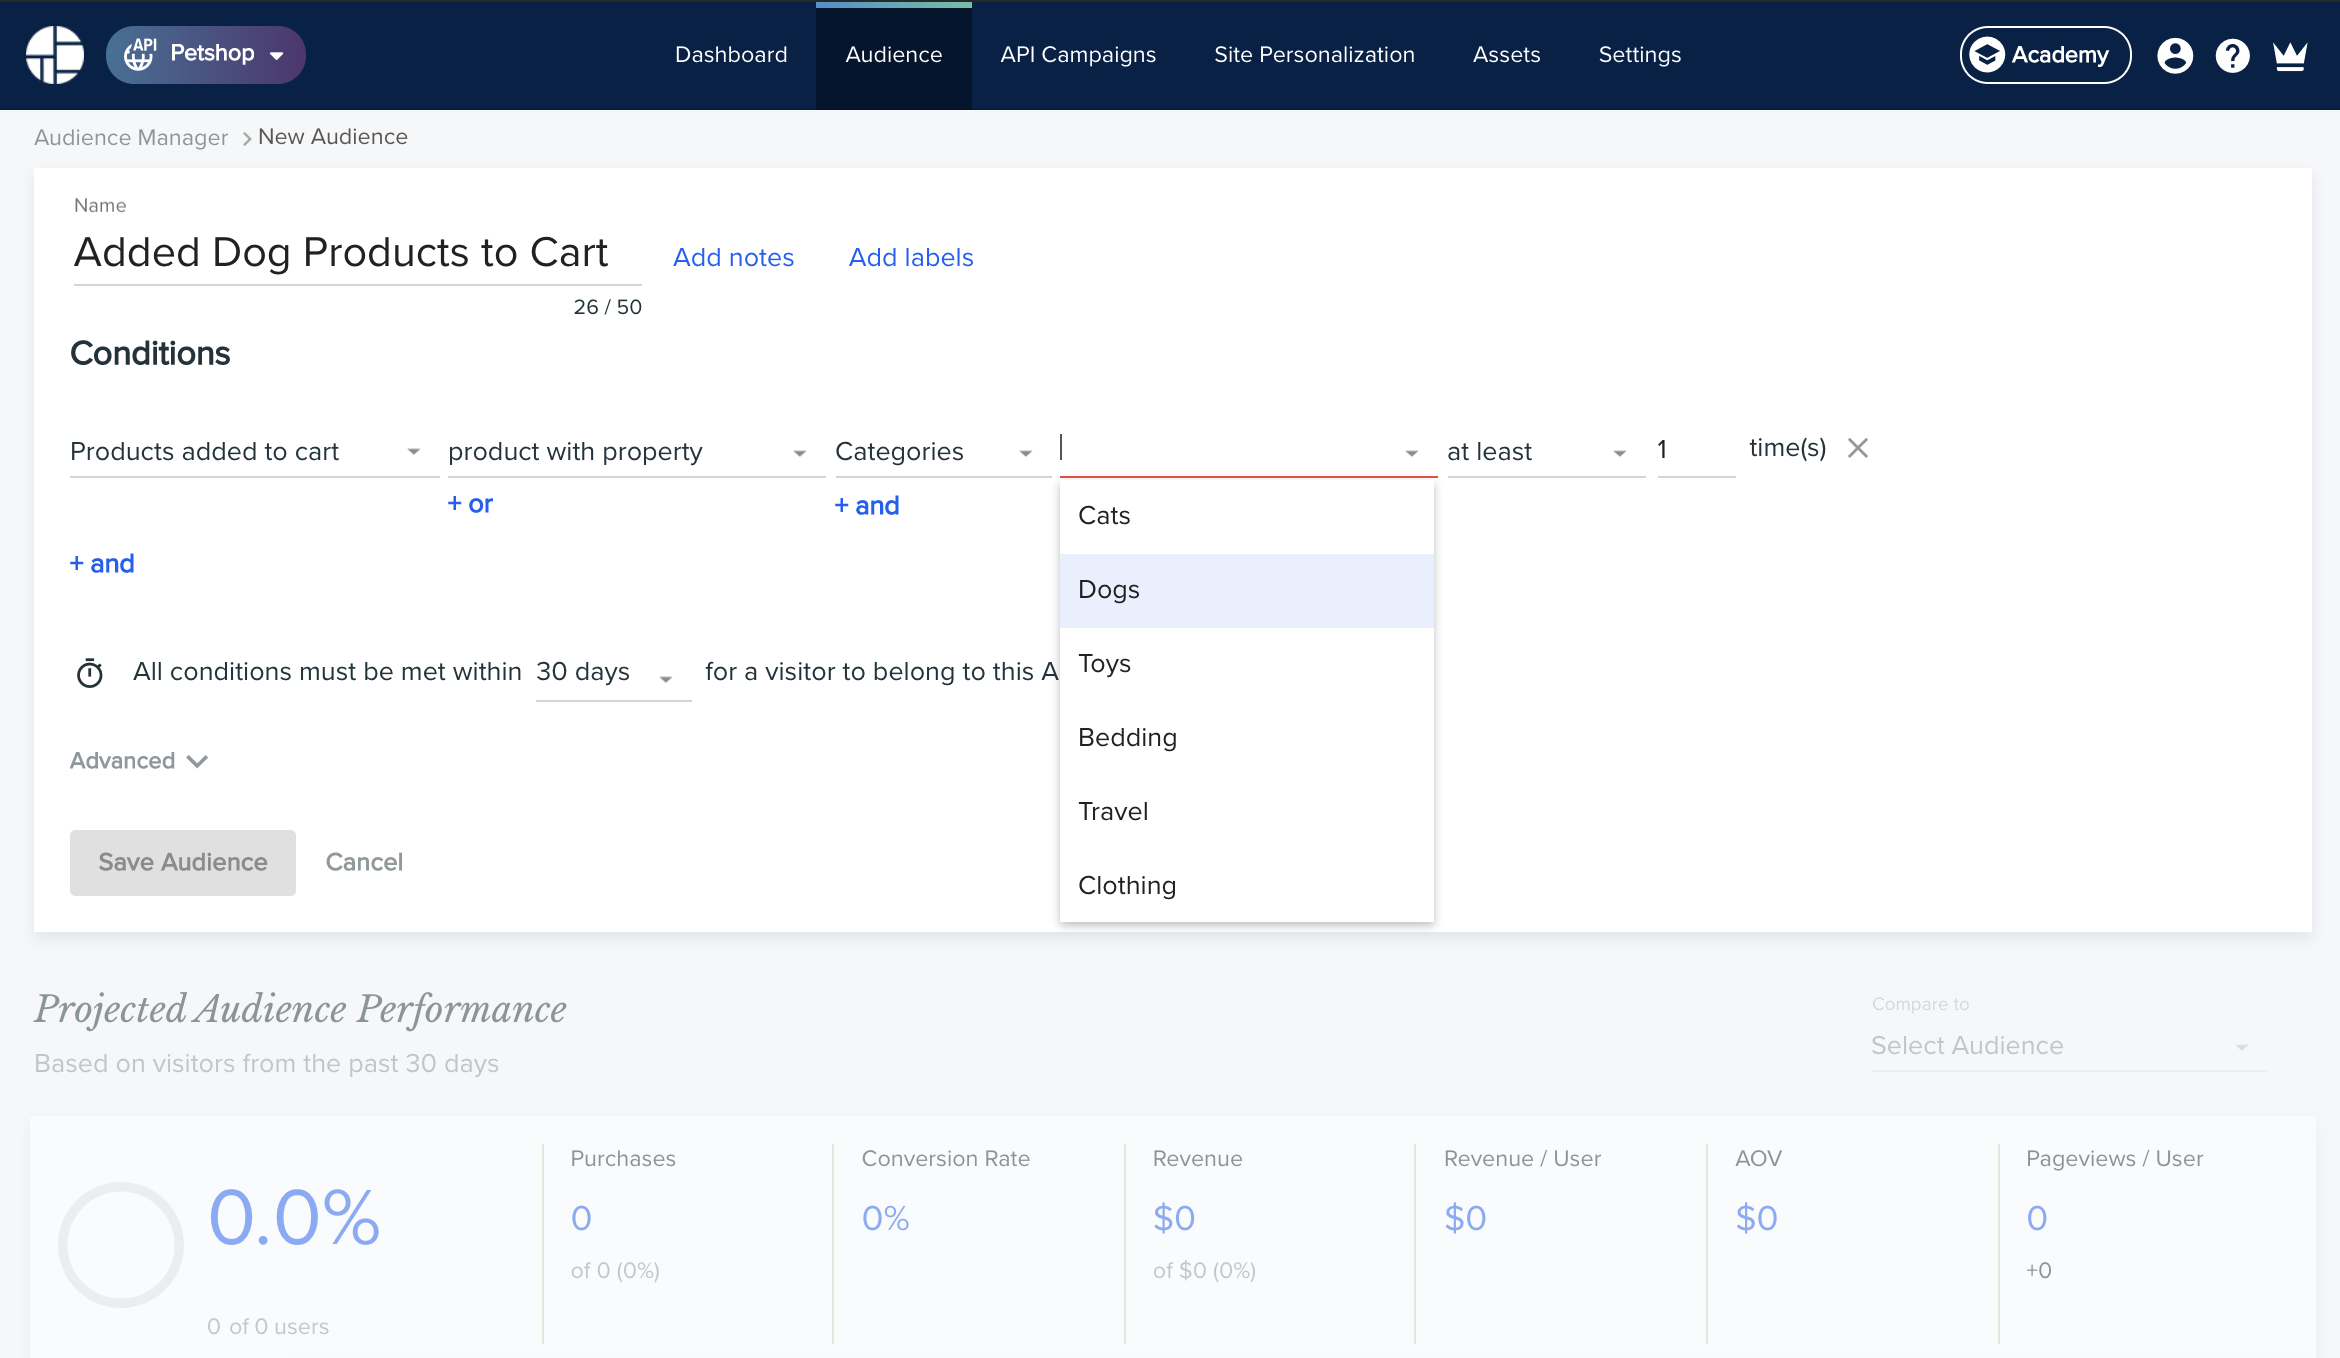
Based on the event we’ve just integrated, you will now create an audience for those die-hard canine-loving users who’ve added dog-related products to the cart over the last month.
You won’t need to mess with any funky URL paths to filter only this type of product because the Categories column is required in the product feed.
Move on to Audience > Audience Manager, and you’ll see a list already populated with some out-of-the-box audience groups. Click Add New to create a new one.
Audiences in Dynamic Yield support a large number of conditions. Right now, we'll create just a single condition based on Products added to cart, as appears below:

Before saving this audience, take a look at the lower part of the screen titled Projected Audience Performance.
You'll probably see all zeros. No worries! the underlying data used for this ad-hoc query is updated in batch every night. In a production website, it looks more like this.
In the next step we will use this audience for targeting, since we have a hunch that these dog lovers would react well to a variation of the banner that's made just for them.
Side Notes: A Bit More on TargetingIn real life scenarios, the business user probably won't just act on a hunch (well, not always). When running an A/B Test, you can view the performance of each variation broken down per each audience and act accordingly, or wait for Predictive Targeting to surface such insights for you.
As you can probably guess, there are many ways to try and define audiences of "dog lovers" of varying size, revenue per user (ARPU) and how keen the audience members are on doggie-devotion. One of the best ways to do so is using Affinity, which abstracts away the nitty-gritty details of manually defining just the right conditions.
Updated 23 days ago