Reporting Clicks
The Server Side
The Petshop server abstracts the usage of Dynamic Yield API from the client site, as much as possible. Hence, we will not report clicks on variations in the client directly to Dynamic Yield, but rather add a new route on the Pershop server to proxy that.
First, let's add a helper function for calling the API endpoint in the DYAPI.js module. Add the following function at the end of the file, and modify the exports declaration accordingly:
async function reportClick(userId, sessionId, engagement) {
  try {
    const options = {
      method: 'POST',
      url: `${DYHOST}/v2/collect/user/engagement`,
      headers: {
        'DY-API-Key': APIKEY,
      },
      body: {
        user: {
          id: userId,
        },
      	session: {
      	  custom: sessionId,
      	},
        engagements: [engagement],
      },
      json: true,
    }
    const response = await request(options);
    console.log("Engagement reported: " + JSON.stringify(engagement));
  } catch (e) {
    console.error(`ERROR IN ENGAGEMENT: ${e.message}`);
  }
}

module.exports = {
  choose,
  reportClick
};Second, let's create a new HTTP endpoint in the Petshop server, which will be mapped to the URL path /reportClick. Create a new file named routes/reportClick.js with the following code:
const router = require('express').Router();
const DYAPI = require('../DYAPI');

router.post('/', (req, res) => {
  const payload = req.body;
  DYAPI.reportClick(req.userId, req.sessionId, payload);
});

module.exports = router;Finally, let's hook this new handler to the Express web server. Two lines should be added at the appropriate positions in the main application module app.js:
/* Add to the require calls at top of file */
const reportClickRouter = require('./routes/reportClick');

// ...
app.use('/category', cateogryRouter);
app.use('/cart', cartRouter);
/* Add the new handler: */
app.use('/reportClick', reportClickRouter);
The server is now ready to accept click reports and pass them on.
The Client Side
Look closely at the response returned when you called choose in the previous step, and you'll note that an attribute named decisionId was also returned. This identifier holds all that Dynamic Yield needs to know in order to properly attribute the click to the right experience.
The specifics of how to store the decisionId and pass it on to the API on any variation clicked are highly dependent on the framework you use. For the Petshop, here's what we'll do:
- Store the identifier as a data attribute on the clickable DOM element holding the rendered variation. In our case, that's the "call to action" button in the hero banner.
- Add a "catch-all" client-side function for finding page elements having this attribute, and attaching a click listener to them.
- The listener function will call the new
/reportClickserver endpoint which we've just added, passing that identifier.
First, open views/homepage.pug - this is the server-side template where the homepage banner is rendered. Locate the line:
a.ps-cta-button(href= heroBanner.link) #{heroBanner.cta}Change that line to add the data attribute data-dy-decision-id:
a.ps-cta-button(href= heroBanner.link data-dy-decision-id= heroBanner.decisionId) #{heroBanner.cta}To connect the click listener, open the file public/javascripts/main.js. We haven't touched on this file till now: it holds client-side code that is included in all pages by the layout.pug template.
Add the following code below the existing hideOverlay() function:
/* Add after hideOverlay() function: */

  document.querySelectorAll('[data-dy-decision-id]')
    .forEach(function(variationNode) {
      variationNode.addEventListener('mousedown', function() {
        reportClick({
          type: 'CLICK',
          decisionId: variationNode.getAttribute('data-dy-decision-id'),
        });
      });
    });

  function reportClick(engagement) {
    var xhr = new XMLHttpRequest();
    var url = '/reportClick';
    xhr.open('POST', url);
    xhr.setRequestHeader('Content-Type', 'application/json;charset=UTF-8');
    xhr.send(JSON.stringify(engagement));
  }

// Existing end of file
})();
This code above sure isn't as pretty as the $CURRENT_HIP_SPA_FRAMEWORK but it does do the work - and with that, we're now ready to test.
Refresh the Petshop homepage in your browser, and click on the homepage banner.
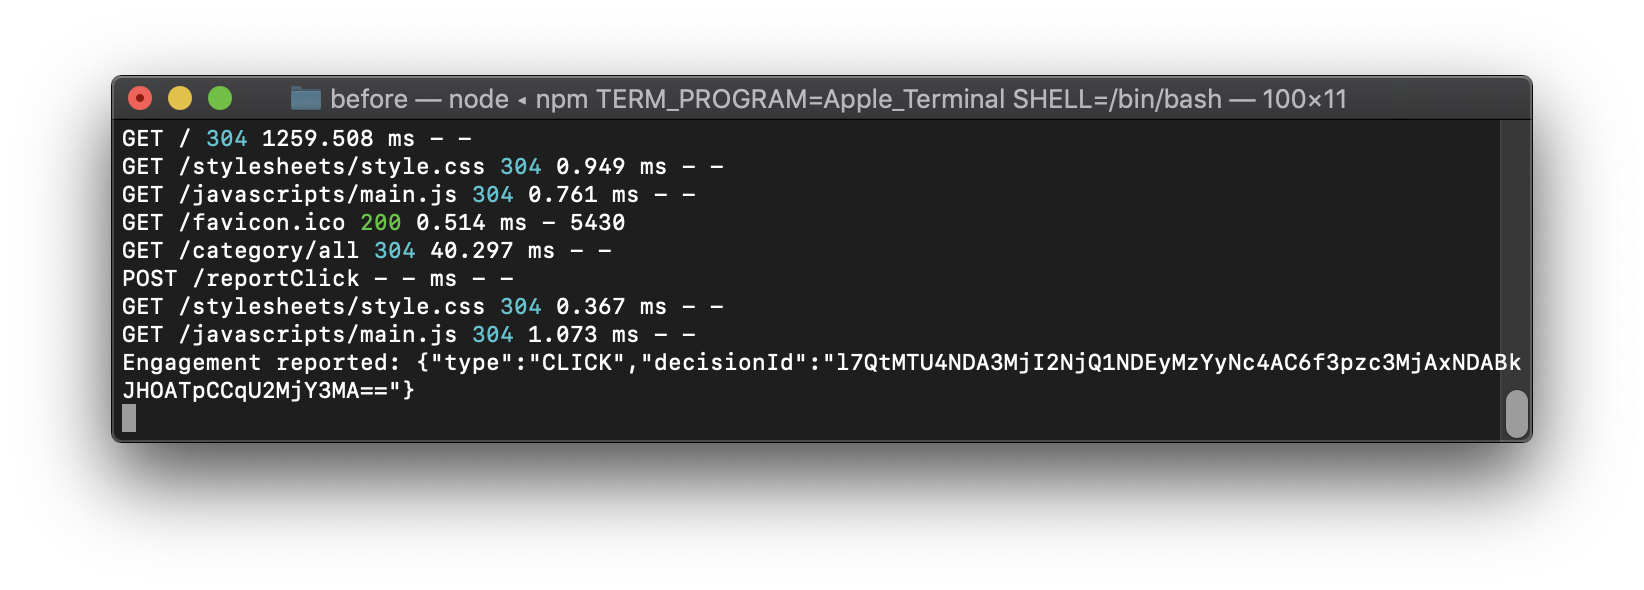
If all goes well, you should see a console log message saying "Engagement reported", like this:

As a reminder, you can hit the API Logs screen again to see all details of the requests made.
Checking Out the Report
After making a few clicks, and then waiting a moment for data to be aggregated in Dynamic Yield's backend, go checkout the report for this campaign. From the list of API Campaigns, click on the little graph icon to the right of your first campaign:

In the report screen, scroll down a bit to see the variation performance:

If you don't see any data, ensure the time range selector at the top-right of the report is set to Current Version (Today). This is the default view for experiences just created today, and the underlying data is updated every minute. Some of the other views do not include today's data.
What's that "Probability to Be Best" column?At the right, you can see the "Probability to Be Best" column with its value marked as pending for both variations. This metric is somewhat reminiscent of the old p-value you probably know, but the math behind is actually fundamentally different: it is based on Bayesian Inference.
There's so much more to learn about the proper setup of an A/B Test, but this is out of scope here. Check out this Support Site article if you want a sneak peek down the rabbit hole.
To Sum Up
We've set out to capture clicks, which are the primary metric for this experience. That's all well and nice, but let's move on to tracking other significant end-user activities - such as adding a product to cart. A lot of new functionality would then be available to us, such as targeting variations based on the historical activity of the end user.
Let's see what it takes to track such events, and then a bit on how to put them to use with Audiences and Targeting.
Updated 23 days ago