Sync User Profile Data via API
Real-time updates of user CRM attributes from outside of Dynamic Yield.
The User Profile Data API enables you to update user profile data on demand, including partial updates. This is “static” information, such as CRM data, including loyalty tier, age group, location, and more. Syncing this type of data via API required some preparation, as described herein.
Dynamic Yield offers two APIs for syncing user data:
- User Profile Data API: The API described here, for syncing user attribute data. See the User Profile Data API reference. Note that user profile data can also be synced via CSV file upload.
- External Events API: Updates events associated with a user, which occurred offline or otherwise outside of Dynamic Yield, such as offline purchases or item returns. See the External Events API reference.
User Profile Data API onboarding flow
The onboarding process includes the following steps:
- Step 1: Preparation: Decide which attributes to pass in the API.
- Step 2: Create your JSON schema: Set up the schema that determines where and how the information is stored in Dynamic Yield.
- Step 3: Set up your sync source: Then test and validate.
Step 1: Preparation
- Decide which attributes to pass in the API (including the attribute name, type, and so on). Note: For privacy reasons, do not include any attributes that are considered PII (such as name, date of birth, address, and so on).
Pro tip:All user attributes must be sent in each API call. You can streamline the process by grouping the attributes based on use cases, for example, based on:
- Frequency: Group together fields that you plan to update with the same frequency (eliminates needless updates).
- Attribute availability: All attributes that are updated in the feed must be available for each API call, so separate those that change infrequently from those that change often.
- Number of users to update: For a small number of user updates, the API is best suited. If you need to do a full update, use the API load or a CSV file method.
- Generate an API key (if you haven't already done so).
Step 2: Create your JSON schema
The schema is a table that determines where and how the information is stored in Dynamic Yield. This information is provided in JSON syntax and copied into the JSON field in Experience OS.
We've created a tool to make creating and modifying your JSON schema easier:
JSON schema rules
Goal
The purpose of the schema is:
- Define the table where the data is stored, so values can be validated when they are sent via the API or CSV.
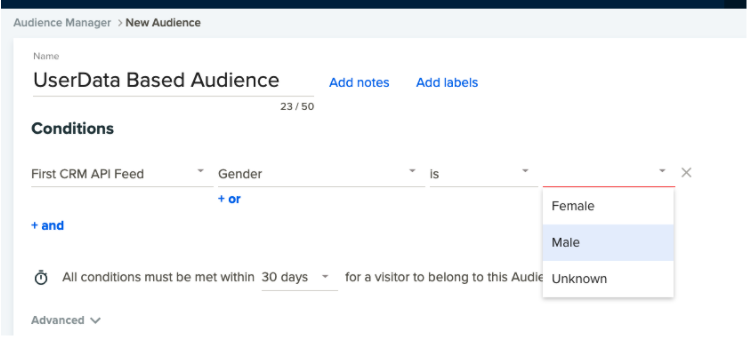
- Define how the Dynamic Yield console shows the condition (when defining an audience based on criteria).
Size limitation
The JSON definition schema cannot exceed 64K.
Fields
Each field is stored as an object within the fields array. The JSON schema must include at least 1 object in the field array, with the following parameters, as shown in this example:
"fields": [
   {
      "name": "purchase_count",→ field name, sent in the API
      "display": "Purchase Count", → the condition name, that appears in DY admin
      "type": [
        "null", → is the object nullable or not.
        "int" → nature of the field passed
      ],
      "uiType": "number", → nature of the field that appears in Experience OS
      "default":null
}
]
Additional values in the layout
If you want to create display values in Experience OS in addition to those set in the schema:
- Create a UI object that contains its definition (for example, map “true” to “t”).
- Parallel to the
fieldarray, add auiTypesobject. - Map that UI object using the existing field object.
- Verify that each UI object in the field array is defined.
What this might look like:

Sample code:
"fields": [
{

      "name": "has_offer",
      "display": "Has Offer",
      "type": [
        "null",
        "boolean"
      ],
      "uiType": "ref",
      "uiTypeRef": "UIhas_offer",
      "default":null
    }
],

"uiTypes": {
    "UIhas_offer": {
      "uiType": "select",
      "validation": {
        "values": [
          {
            "name": "Yes",
            "value": "true"
          },
          {
            "name": "No",
            "value": "false"
          }
        ]
      }
    }
Editing an active JSON schema
You can edit an active schema according to the following rules and limitations:
You can:
- Add or remove values, as long as they are not in use in an audience conditions
- Change display names of fields
- Add new fields:
- Add only at the end of the existing schema.
- Fields must be nullable (non-mandatory) (must be of type “null”).
- Make sure to include the
"default": nullparameter.
You can't:
- Delete fields.
Pro tip: Instead, change a field to non-mandatory and stop updating it. - Change the order of fields.
- Change field types.
- Remove “null” from a field type, as it will make the field mandatory.
Note that when you save the edited schema, your changes apply immediately. Make sure to update your API calls accordingly.
Sample schema code
Note: This object includes several attribute types that can be referenced. Although the JSON format doesn’t support comments, this example includes some "fake" comment lines, beginning with "//" followed by the comment text. If you decide to use these objects, make sure to first remove these lines.
{
  "fields": [
    {
      "//": "Field with values example - Referenced in uiType with the possible values",
      "name": "VIPPersona",
      "display": "VIP Persona",
      "type": [
        "null",
        "int"
      ],
      "uiType": "ref",
      "uiTypeRef": "UIMetalVIP",
      "default":null
    },
    {
      "//": "Number example - no need to reference in uiType",
      "name": "CustomerScore",
      "display": "Customer Score",
      "type": [
        "null",
        "int"
      ],
      "uiType": "number",
      "default":null
    },
    {
      "//": "string example - no need to reference in uiType",
      "display": "Account Manager",
      "name": "AccountManager",
      "type": [
        "null",
        "string"
      ],
      "uiType": "input",
      "default":null

    },
    {
      "//": "Boolean example - no need to reference in uiType",
      "name": "IsSubscribedTo",
      "display": "Is Subscribed To Emails",
      "type": [
        "null",
        "boolean"
      ],
      "uiType": "ref",
      "uiTypeRef": "UIIsSubscribed",
      "default":null
    },
    {
      "//": "Date example - no need to reference in uiType",
      "name": "AnniversaryGiftExpires",
      "display": "Anniversary Gift Expires",
      "type": [
        "null",
        "long"
      ],
      "uiType": "date",
      "default":null
    },
    {
      "//": "Array of enums example - values that can be selected from a dropdown - Referenced in uiType with the possible values",
      "name": "VIPPersona",
      "display": "VIP Persona",
      "type": [
        "null",
        {
          "type": "array",
          "items": "int"
        }
      ],
      "uiType": "ref",
      "uiTypeRef": "UIMetalVIP",
      "default":null
    },
    {
      "//": "Array of strings example - no need to reference in uiType",
      "name": "nicknames",
      "display": "Nicknames",
      "type": [
        "null",
        {
          "type": "array",
          "items": "string"
        }
      ],
      "uiType": "input",
      "default":null,
    }
  ],
  "uiTypes": {
    "UIMetalVIP": {
      "//": "Example how to represent different display values in the Dynamic Yield console",
      "uiType": "select",
      "validation": {
        "values": [
          {
            "name": "VIP Gold",
            "value": 0,
            "source": "goldVIP"
          },
          {
            "name": "Other",
            "value": 1,
            "source": "otherVip"
          },
          {
            "name": "VIP Silver",
            "value": 4,
            "source": "vipSilver"
          }
        ]
      }
    },
    "UIIsSubscribed": {
      "//": "Admin vallues: boolean",
      "uiType": "select",
      "validation": {
        "values": [
          {
            "name": "No",
            "value": "false"
          },
          {
            "name": "Yes",
            "value": "true"
          }
        ]
      }
    }
  }
}For arrays of enums or Boolean types, avoid the using the string "any" in the value for uiType.
Step 3: Set up your sync source
Add a source
- Go to Audiences › Extensions, and in the Profile area, click Add Source.
- For the source, select Sync via API.
- Enter the schema for the sync.
- Define the identifier type. The default type is a hashed email address, so you need to change this value only if you want to use a different ID type. Additional supported values include DYID, and Other (you define the type).
- Click Save as Draft.
Test the sync
This is an important step, because after activation, the schema can be changed only in limited ways. The test user data is not committed, and campaigns do not yet work, so you can adapt as needed at this stage.
- Call the API you coded in the previous step.
- The API call returns a transaction ID in a field called
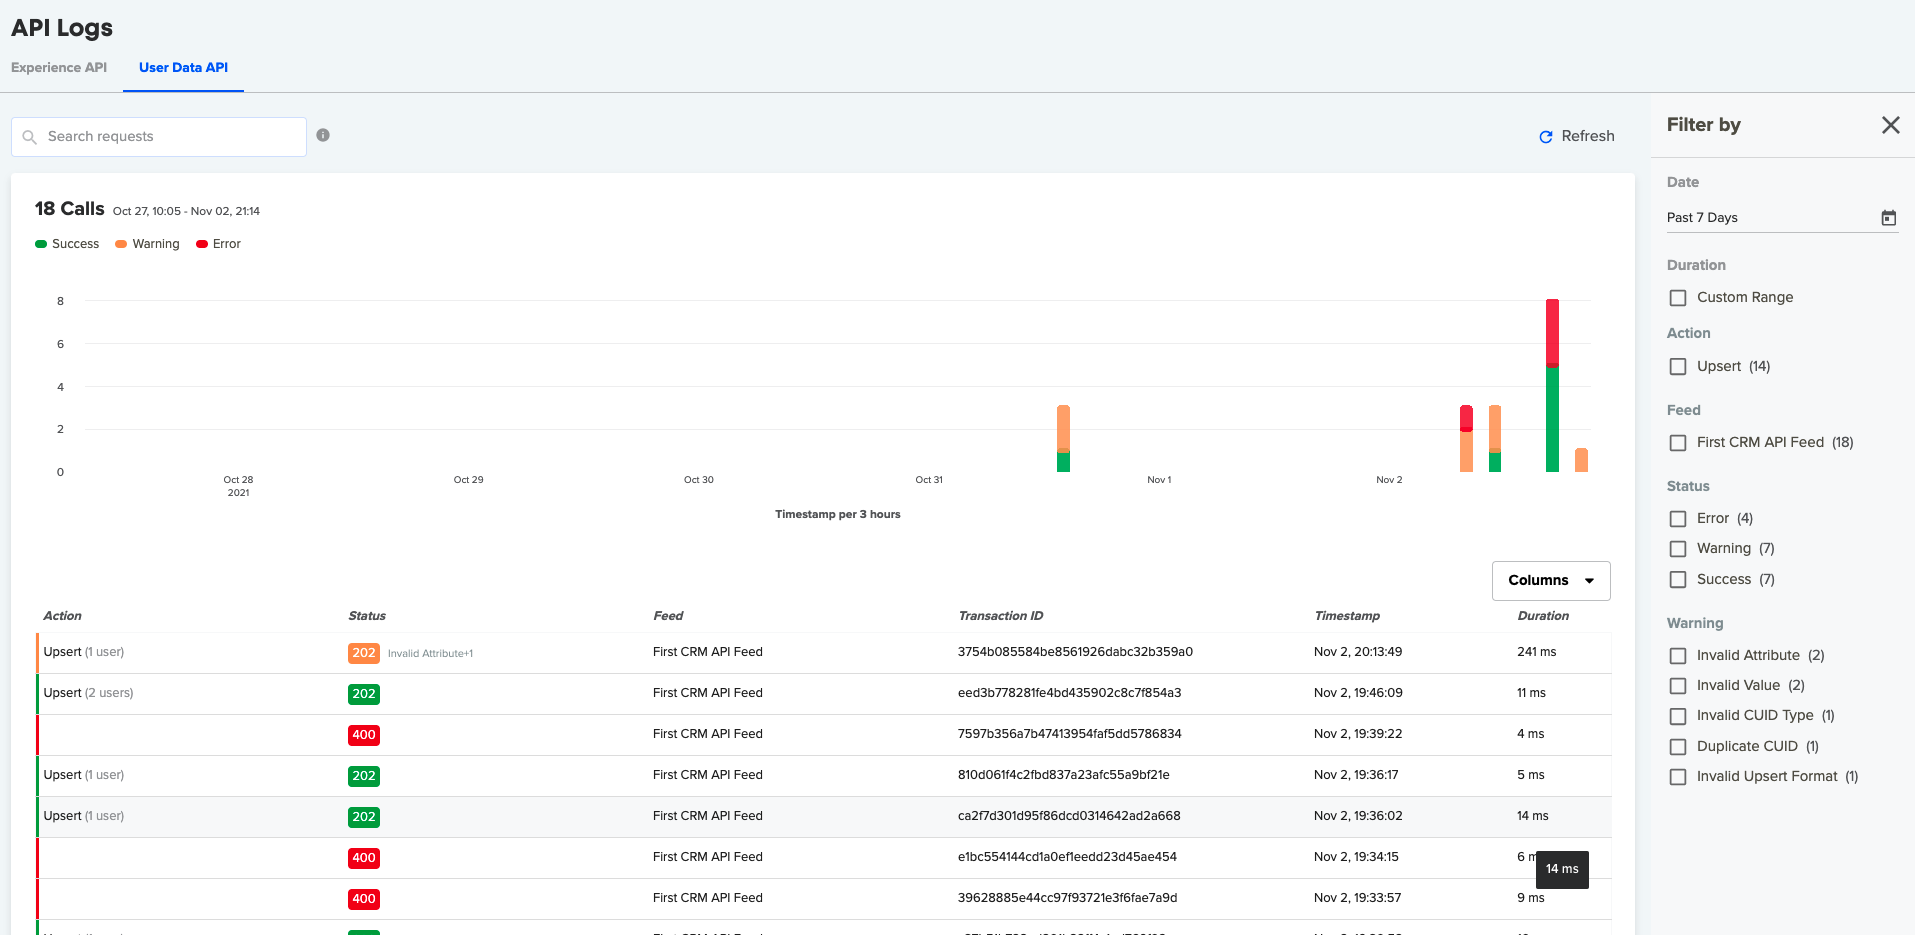
dy_trace_id. Using this ID, go to the API log and search for the API call status. - In the log, ensure that the API request status is correct (202). Then, check that no errors exist for the nested objects (the API call status that is returned doesn't include them).

When the API is called, a status is returned indicating that the call has been received. In the log, you can see the details of any errors for each action, relating to specific objects they include.
Start syncing user profile data
- Activate the sync.
- Call APIs in accordance with your business flow.
- Monitor the feed. For more information, see Experience APIs Logs and Alerts. The User Data API logs behave the same.
ImportantYou can change your sync method from CSV to API, for the same schema (no changes), by editing your source in User Data Enrichment. However, you can't switch back from API to CSV, so make sure this is the correct method for you before you make the change.
Prerequisites and limitations
- An API-based feed can't be changed to the CSV method.
- Each site must have a unique API key.
- API request limit:
- You can update up to 100 users in 1 API call
- Up to 100 API calls in 1 second, adding up to 600K updates per minute
- Payloads that exceed 33K will not be displayed in the API logs
Updated 27 days ago