Setting Up a Custom Domain
By default, Landing Page campaigns are served with a Dynamic Yield domain (lp.dyo.io). However, you can serve these campaigns with your own domain instead. This requires changing your DNS settings on your domain provider.
See the included pages to learn how to set up your custom domain, and configure your custom domain to work with HTTPS.
- In Experience OS, go to Settings › General Settings.
- In the Custom Domain section, click Add Domain.
- Enter the URL of your custom domain. It's usually your domain with a subdomain (for example, if your domain is "www.mystore.com", you might use "dy.mystore.com")
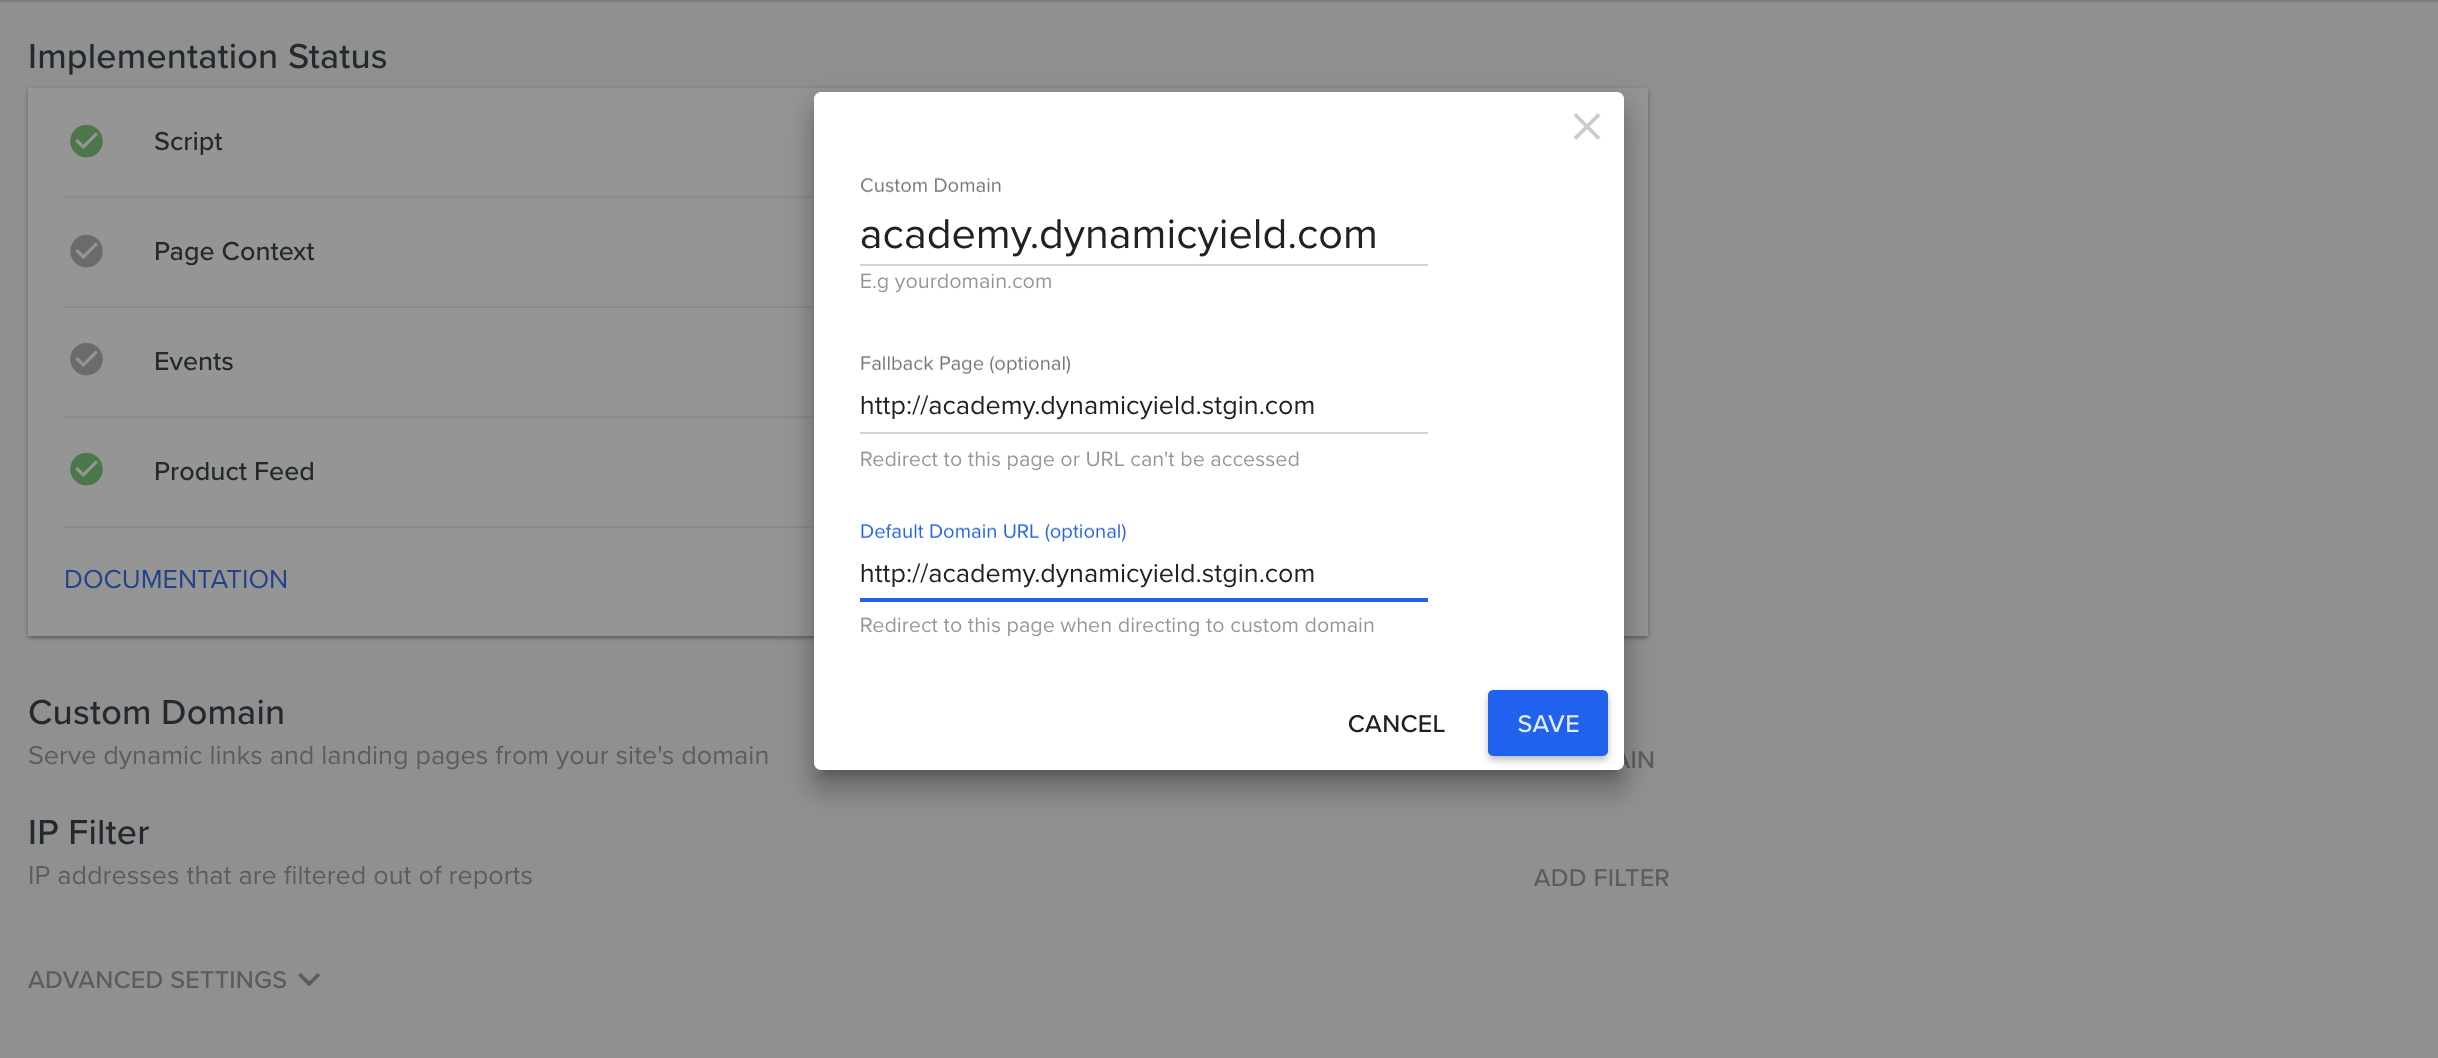
- Enter a fallback URL if the page is not available (for example, if a landing page was deleted).
- Enter a default domain URL. This is the page that the user will be directed to when entering just the domain (for example, dy.mystore.com)
- Click Save.
- Continue with the required change in your DNS provider as described in the next section.
Setup in your DNS provider
Go to your DNS provider, and change the CNAME record of this new domain (for example, dy.mysite.com) to point to srv.dynamicyield.com (or srv-eu.dynamicyield.com if you are using the Dynamic Yield EU data center). This is done differently for each domain provider, so refer to your provider's documentation for details.
Updated 6 months ago
Did this page help you?