Shopify Hydrogen 2 Store
This article lists the steps for implementing Dynamic Yield on your Shopify Hydrogen 2 store.
Step 1: Sync your product catalog with Dynamic Yield
A synced product feed enables capabilities like recommendations, segmenting based on product engagement, social proof tactics, and more. To sync your catalog:
- Install the Dynamic Yield v2 Shopify app on your store.
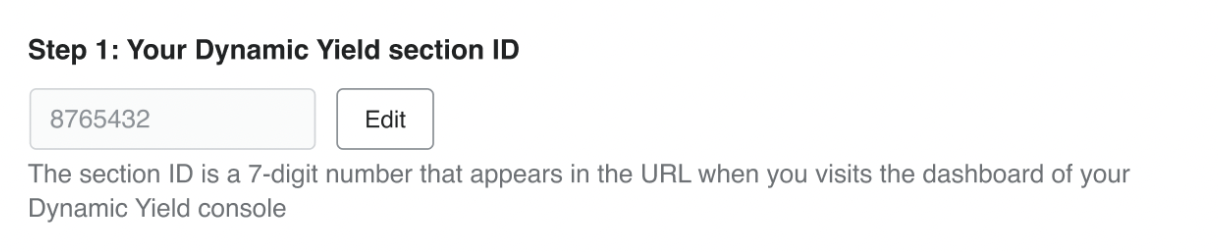
- Next, in the app configuration, enter your section ID:
- Enable syncing the product catalog with Dynamic Yield, and follow these instructions.
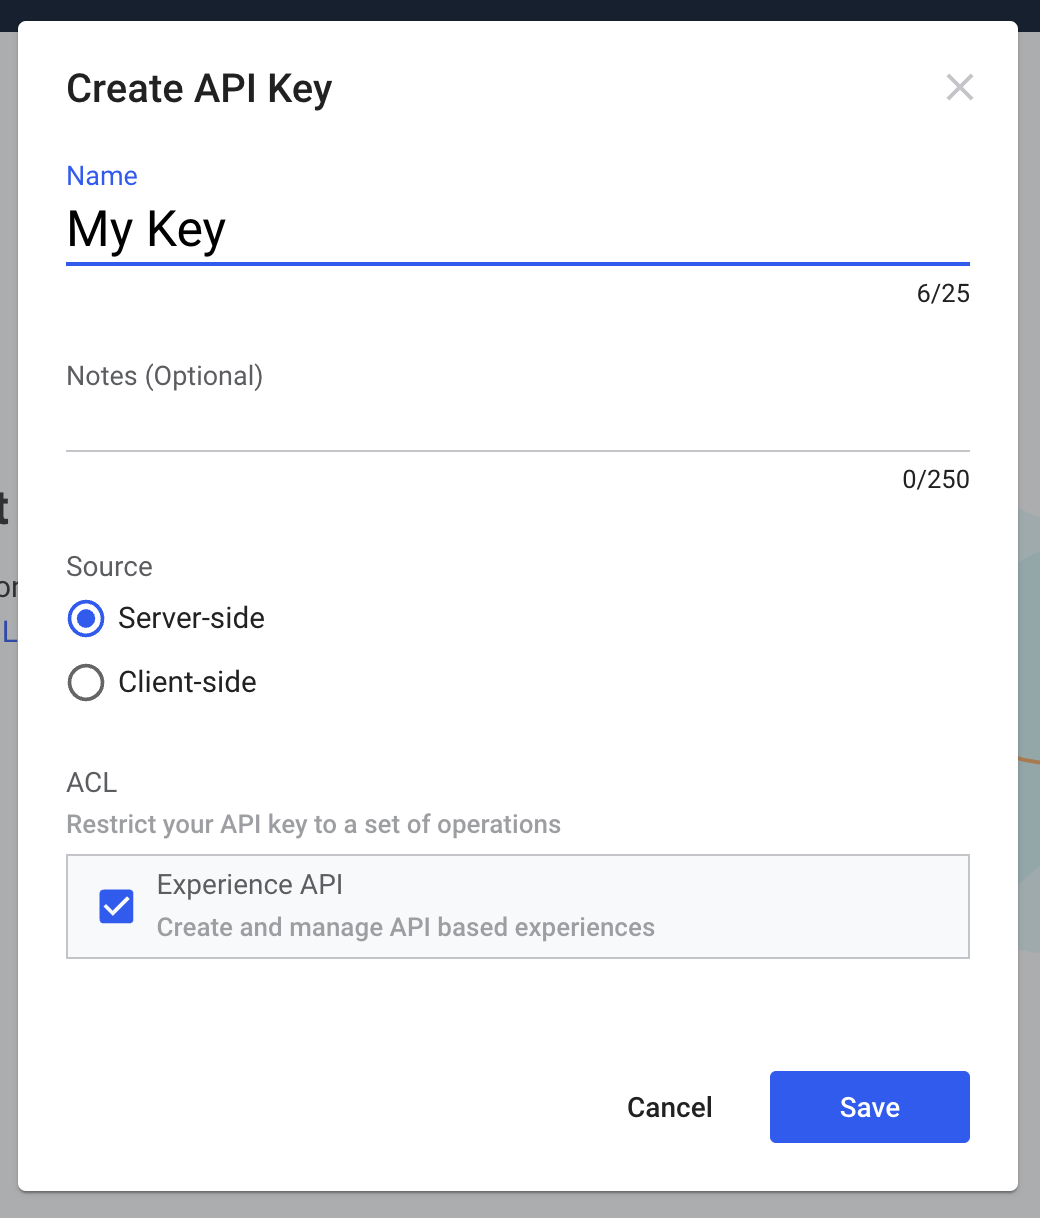
Step 2: Generate API keys
Create a server-side API key with an ACL of Experience API. You’ll use this API key throughout your implementation.
Step 3: Track events
Report any meaningful actions that users perform on your site or app. Implementing Purchase and Add to Cart events is mandatory, but we recommended implementing additional events, such as signup and login. Learn more about tracking events.
Step 4: Make a choose call on every page
choose call on every pageGenerally, on every page of your store, you'll trigger an API call called Choose, which has 2 functionalities: The first is reporting a pageview to Dynamic Yield, and the second is serving as the container of the content request for campaigns that run on this page. Because you’re only in the implementation phase and have yet to create a campaign, it will be executed without a campaign request. Later, when you create campaigns, the call should include the selector attribute.
Learn more about Choose API calls.
Step 5: Track engagement with variations
As part of running server-side campaigns on the store, you'll need to track clicks on the content and recommendations that are served.
Learn more about tracking user engagement.
Post-implementation
When you've completed these steps, you can start creating campaigns. Each campaign has a selector that you'll use in your Choose calls. The responses to these calls will include the content the user should receive, whether the content that's targeted to the audience that the user belongs to, or the list of products that should appear in the recommendation widget. This is an ongoing process: Creating the campaign, adding it to Choose calls, and connecting the response to your application's front or back end.
Learn more about creating Server-Side Recommendation Campaigns and Custom Campaigns.
Live Demo
You can view a live demo of a Hydrogen 2 store that includes a full Dynamic Yield implementation here.
You can view the repository of the store here.
Updated 6 months ago