API Keys
API keys give code-level access to Experience OS APIs. For example, to create and manage API-based experiences, or update product feeds.
To ensure that API keys are used responsibly, only teammates with Admin + code editing permissions on the site can create and edit API keys. Admins without editing permissions can view API keys, but can't create or delete them.
Create an API key
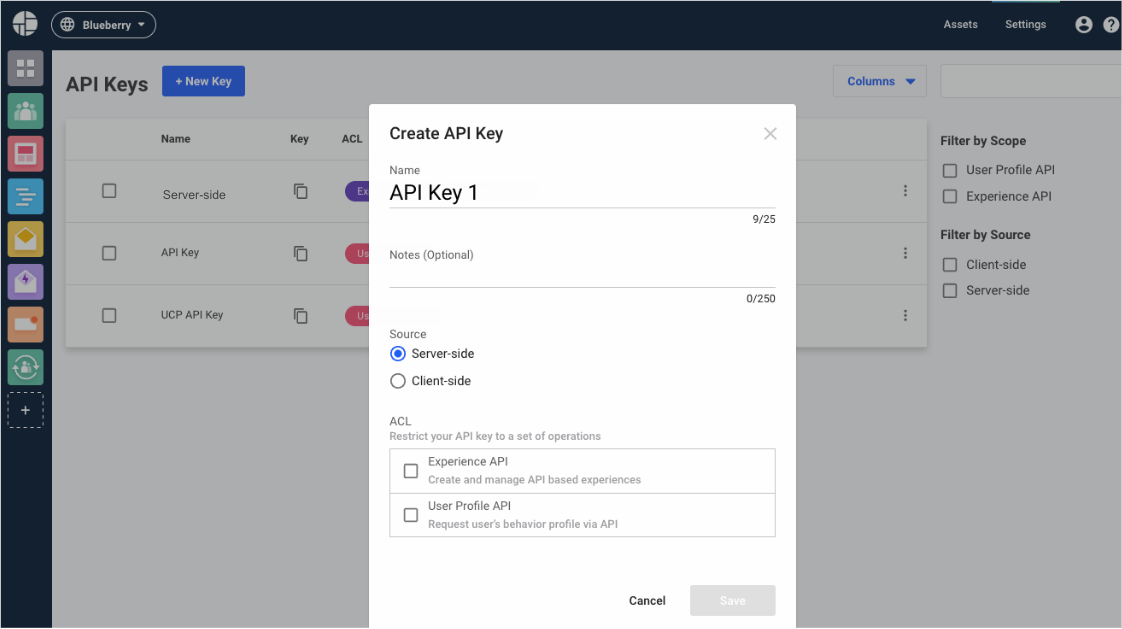
- Go to Settings › API Keys and click New Key.
- Enter a name, and internal notes (optional).
- For the source, select either Server-side or Client-side. Each type can be used only with its designated endpoint.
- In the ACL section, select one or more permissions for the key. Different options appear based on your site's vertical or features that are enabled on your site.
- Click Save.
You can now click Copy to get the key in plain text. Pass the key as an HTTP header with any API call you make. For example:
PUT /v2/feeds/dyid/666532575846065165 HTTP/1.1
DY-API-Key: baadc6ba740a352c9106dc7857a7eb9c
Content-Type: application/json
{// JSON-formatted request body...}POST /v2/serve/user/choose
DY-API-Key: baadc6ba740a352c9106dc7857a7eb9c
Content-Type: application/json
{// JSON-formatted request body...}Delete an API key
Deleting an API key is irreversible, and any APIs referring to a deleted key must be modified to use a new key.
- Go to Settings › API Keys.
- Hover over the key you want to delete and click the trash icon. The key is deleted within a few minutes.
Updated 6 months ago
Did this page help you?