Commercetools
Commercetools is a headless, API-first commerce platform that empowers businesses to build customizable, scalable, and flexible e-commerce solutions for seamless customer experiences.
The Dynamic Yield Commercetools integration automatically syncs product feeds from Commercetools to Dynamic Yield to ensure that product recommendations are pulled using the most accurate inventory levels, guaranteeing users an up-to-date shopping experience.
Step 1: Sync your product catalog with Dynamic Yield
A synced product feed enables capabilities like recommendations, segmenting based on product engagement, social proof tactics, and more.
You must enter your AWS S3 access and secret keys to enable the sync. To get these credentials:
In Experience OS:
-
Go to Assets › Data Feeds, and click Add New › Product Feed.
If you already have a product feed, edit it from the feeds view. -
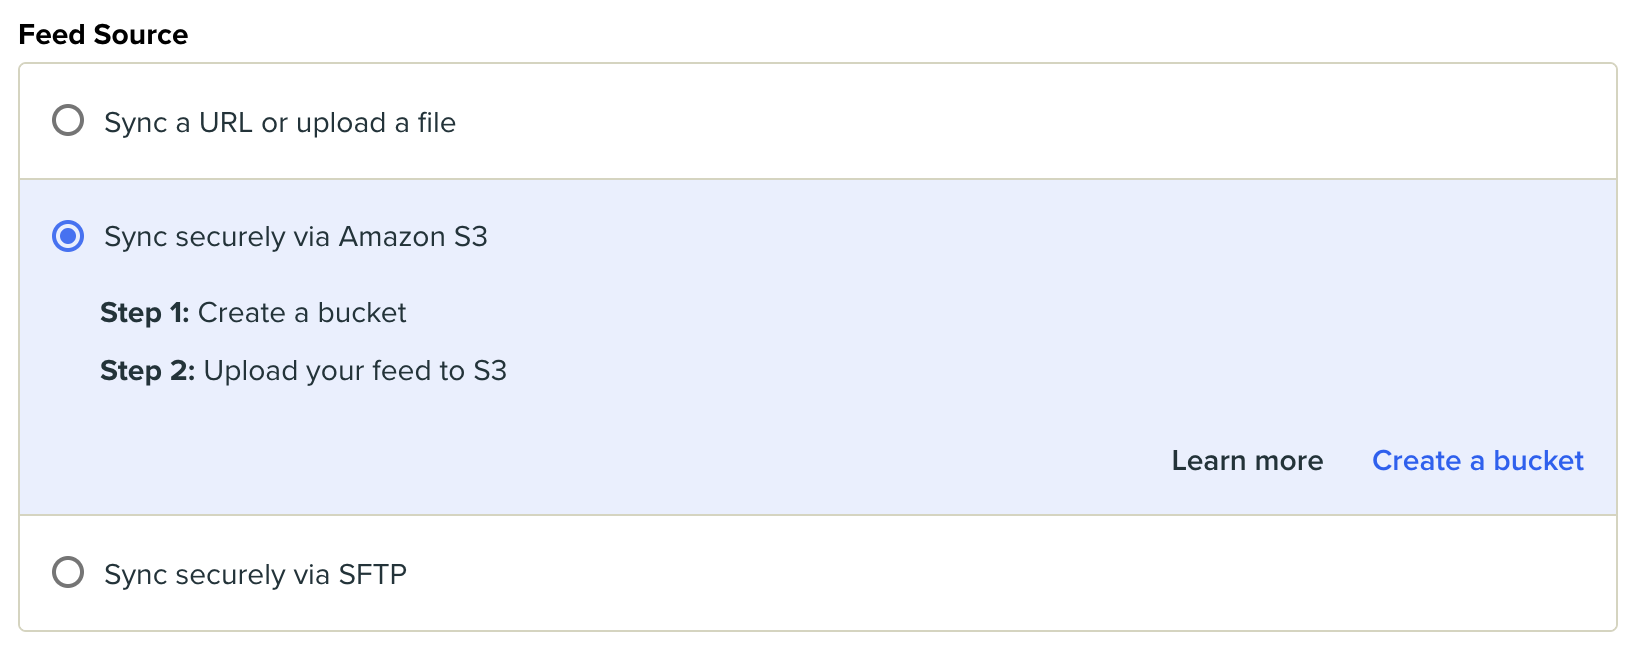
Under Feed Source, select Sync a file via Amazon S3.
-
Click Create a Bucket. The Access Key and Secret Key are displayed .
-
Copy these credentials and paste them into the Commercetools app configuration.
Step 2: Create a custom application in Commercetools
First, install the Dynamic Yield app in your Commercetools store:
-
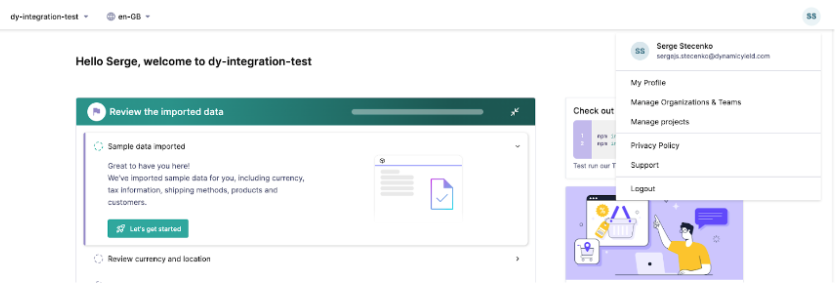
In the Commercetools Merchant Center, go to Manage Organizations & Teams (from your initials in the top corner).
-
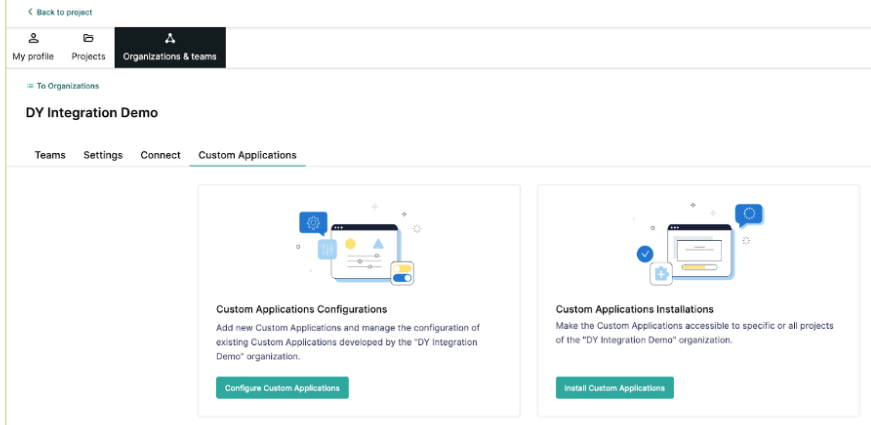
Select your organization, and go to the Custom Applications tab.
-
Click Configure Custom Applications.
-
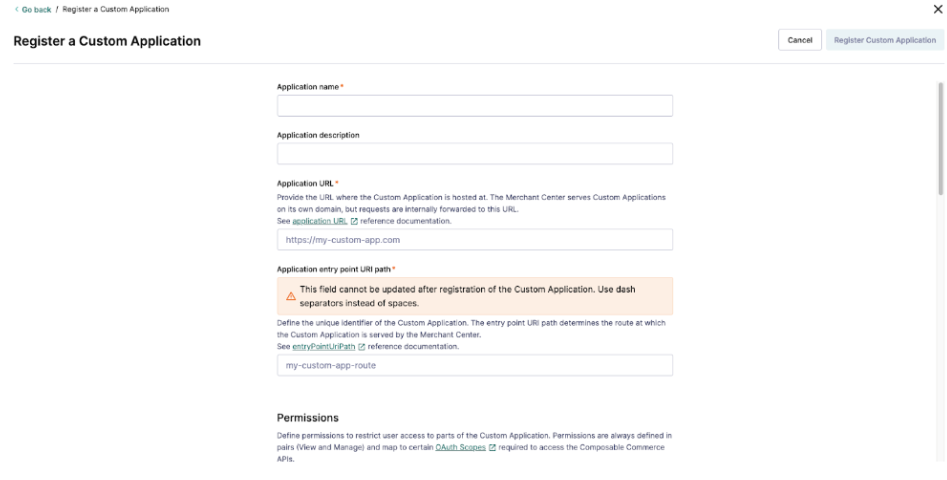
Click ➕ Add a Custom Application, and enter the following information:
-
A name for the app.
-
Any URL (this is a placeholder. You'll need to update it after the app is installed).
-
An Application entry point URI path. Ensure it's the same as the one in the app installation (Connect). This value creates the application URL.
-
-
Set permissions to view_key_value_documents and manage_key_value_documents (needed to read and update the form's configuration data in the app UI. See Custom Objects).
-
Enter the default link label (the App name in the Merchant Center sidebar) (for example, Dynamic Yield Feed Sync), and then select a link icon:
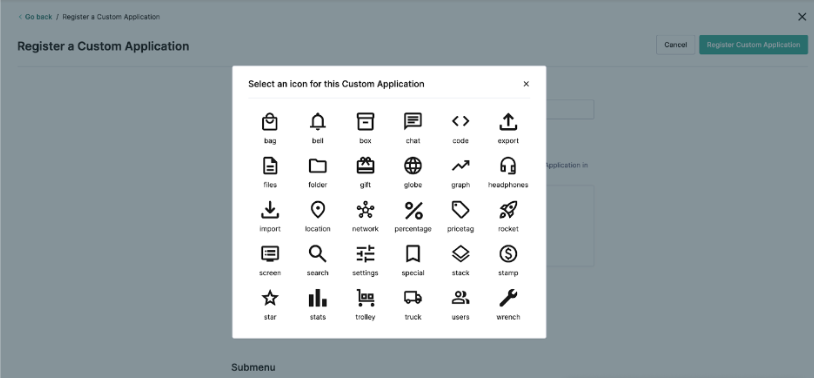
-
Click Register Custom Application. When the Custom Application is registered, copy and save the value of the Application ID.

Step 3: Generate the Client ID and Client Secret
Notes
- CTP_CLIENT_ID and CTP_CLIENT_SECRET might already exist. If so, use these credentials.
- You can see only one of these values at a time, so make sure to save them.
-
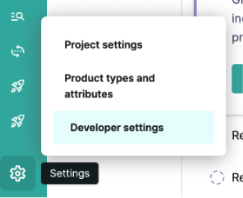
Go to Developer Settings.
-
Create an API client and name it (for example, Dynamic Yield API Client). Select Admin Client from the Scopes dropdown.

-
Copy your client ID and secret and save them.
Step 4: Install the custom application
-
In the Commercetools Merchant Center, go to Manage Organizations & Teams (from your initials in the top corner)
-
Select your organization, then go to the Connect tab › Public Connectors.
-
Search for Dynamic Yield by Mastercard, and then click Install.
-
In the configuration area, select your region, then select the project for which you want to install the application. Click Next.
-
Enter your client ID and secret (that you saved in the previous step).
-
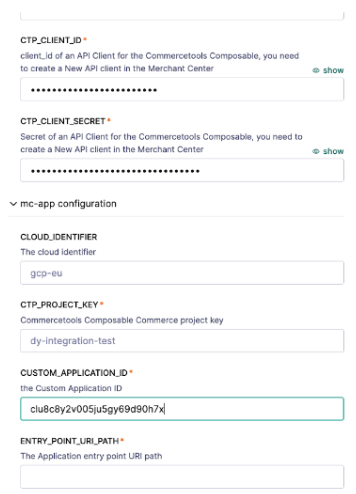
In the mc-app configuration area, enter the following information:
- CTP_PROJECT_KEY: The project where you're installing the integration. For example, in the screen capture, this is dy-integration-test.
- CUSTOM_APPLICATION_ID: Copied during registration in Step 2 .
- CTP_REGION: For example, europe-west1.gcp.
- ENTRY_POINT_URI_PATH: Use the URL path created in the registration process.
- SERVICE_URL: Enter any URL. You'll need to update it after the first deployment).
-
Click Install, and wait for the process to complete. This can take up to ~15 minutes.
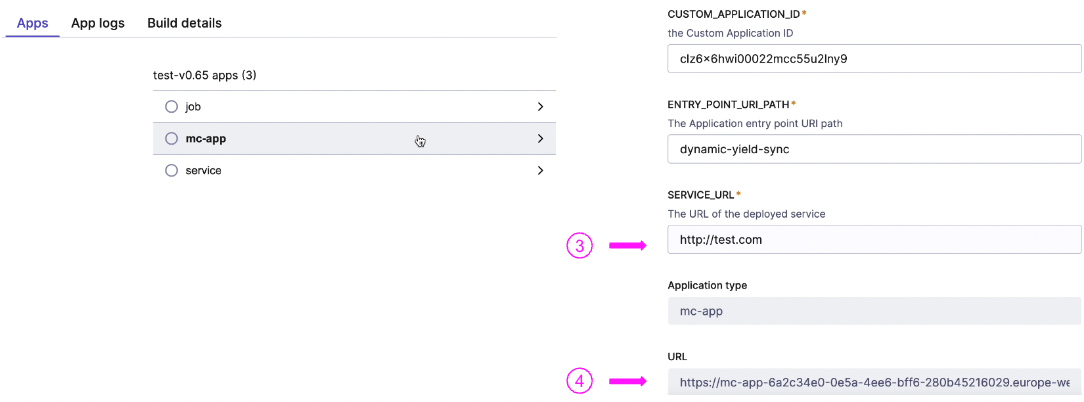
When the installation is complete, the service and application URLs are created. You'll copy and save them in this next step, when you make necessary configuration changes:
-
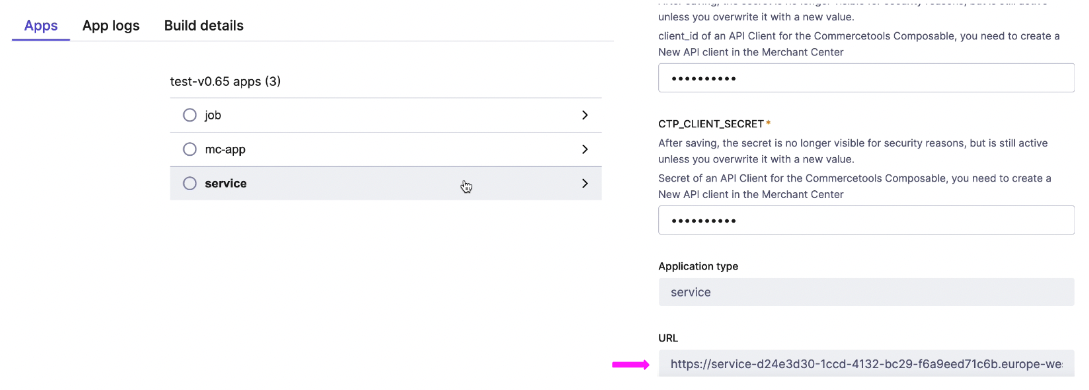
Go to the Connect tab › Manage Connectors › Installations, and click the latest installation.
-
Click service and copy the URL.
-
Click mc-app, and paste the URL in the Service URL field.
-
Copy the URL in the mc-app tab and save it.
-
Redeploy the app, and add the client ID and secret again in the service area. These are necessary for the app to save.
-
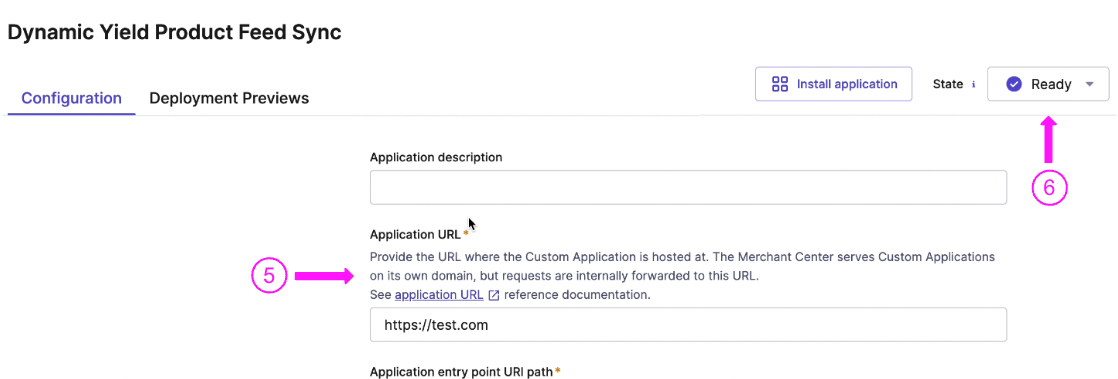
Go back to the custom application and change the Application URL to the one generated during the installation. This is the URL you copied in step 4.
-
Change the state to Ready, and then confirm the change.
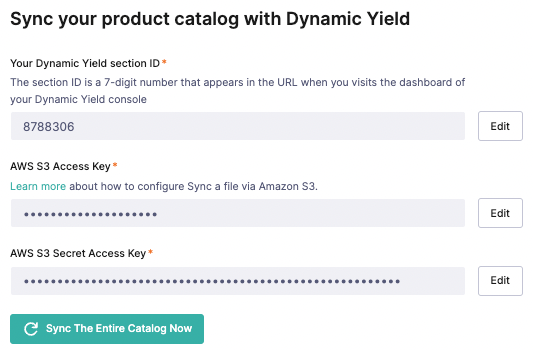
Step 5: Sync your product feed
- Open the app from your sidebar, and enter the Dynamic Yield section ID to sync with.
- Enter your AWS S3 access key and secret key.
- Optionally, enter a parser function. See the next section for details.
- Click Sync The Entire Catalog Now.
The service server process has a timeout of 5 minutes, so if the product feed size is very large, the sync might fail. To make sure that the sync is succesful, insert the details and the product feed will sync with the job process as it has 30 minute server timeout. The automatic sync occurs every 4 hours.
Product feed columns
Mandatory columns
The following table lists the mandatory feed columns, and the recommended Commercetools attributes to sync to these columns. You can use these attributes that you sync in translations, recommendation strategies, targeting, and more.
| Mandatory feed columns | Commercetools attributes (recommended) |
|---|---|
| sku | sku |
| group_id | variantId |
| name | name |
| url | slug |
| image_url | images |
| price | prices |
| categories | categories |
| in_stock | variant.availability |
| description | description |
| keywords | key |
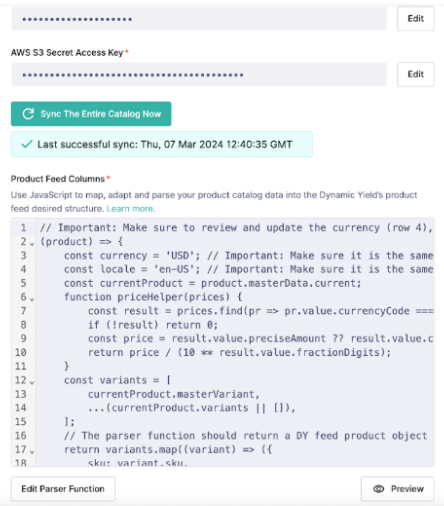
Parser functions
Use a parser function to add to the JavaScript code additional fields to transform any information from a Commercetool Product Object into a flat CSV file that's generated periodically and synced to Dynamic Yield. When you enter the code in the parser function field, you can click Preview to download the file and see the results of your code.
Updated 6 months ago