Your First Campaign
What's in a Hero Banner?
As promised, we’ll start our journey with campaigns at the Hero Banner - that’s how we in the business call that large nice creative that your users see when they land on the homepage.
We will start with a straightforward A/B test and then later see how a marketer can apply any targeting rules without the developer knowing about it. And then change their minds ten times.
Take a look at the hard-coded default defined in routes/homepage.js. Here’s how it looks like now:
// ...

const defaultHeroBanner = {
  image: 'http://cdn.dynamicyield.com/petshop/images/pets-3715733_1920.jpg',
  title: 'We got your pet.',
  subtitle: 'Lorem ipsum dolor sit amet, consectetur<br>adipiscing elit. Etiam fringilla lorem eget lacus',
  cta: 'Go Shopping',
  link: '/category/all',
};

// ....
We want to keep this exact JSON format that the view template knows how to render but create multiple banner variations to be served from Dynamic Yield.
Because we don’t want the poor marketer to write actual JSON, we better create a template for the marketer to use. When creating a new variation, the marketer would use this template as a skeleton and only fill in the blanks: the actual values for the variable names are set up in the template.
Creating the Template
- Go to Assets > Templates and click Add New.
- Name the new template Hero Banner API Template, and select the template type Custom API Campaign.
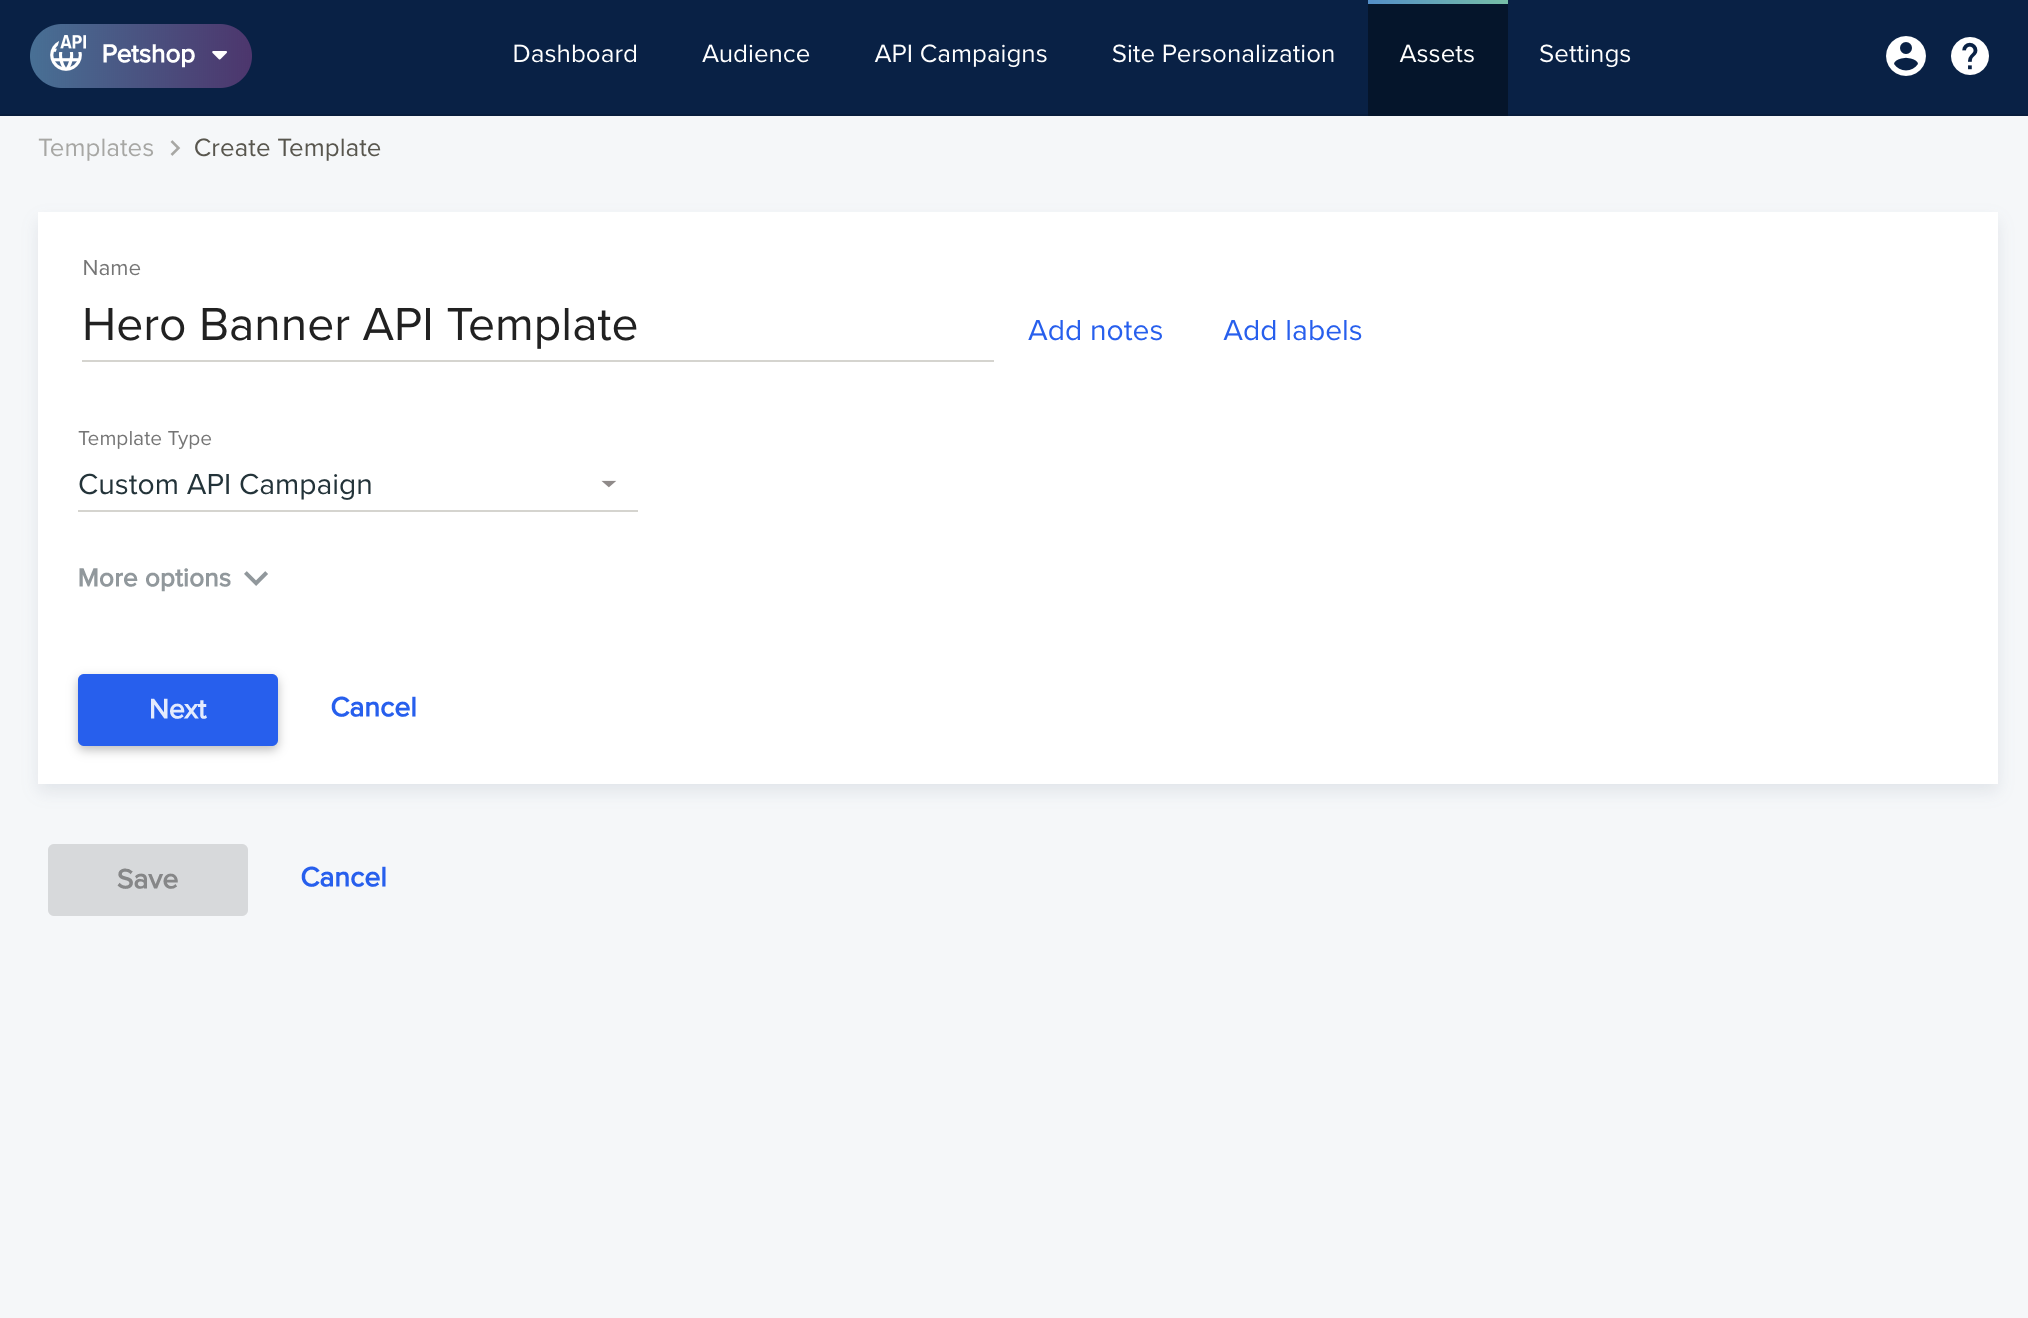
- Click Next to take you to the template editor.
- Switch to the JSON tab to edit the raw JSON structure.
- Paste the content below into the JSON editor:
{ "image": "${image}", "title": "${title}", "subtitle": "${subtitle}", "cta": "${cta}", "link": "${link}" } - Go back to the Variables tab, and you should see these five variables. Feel free to edit the default values for them if you like. It should now look something like this:
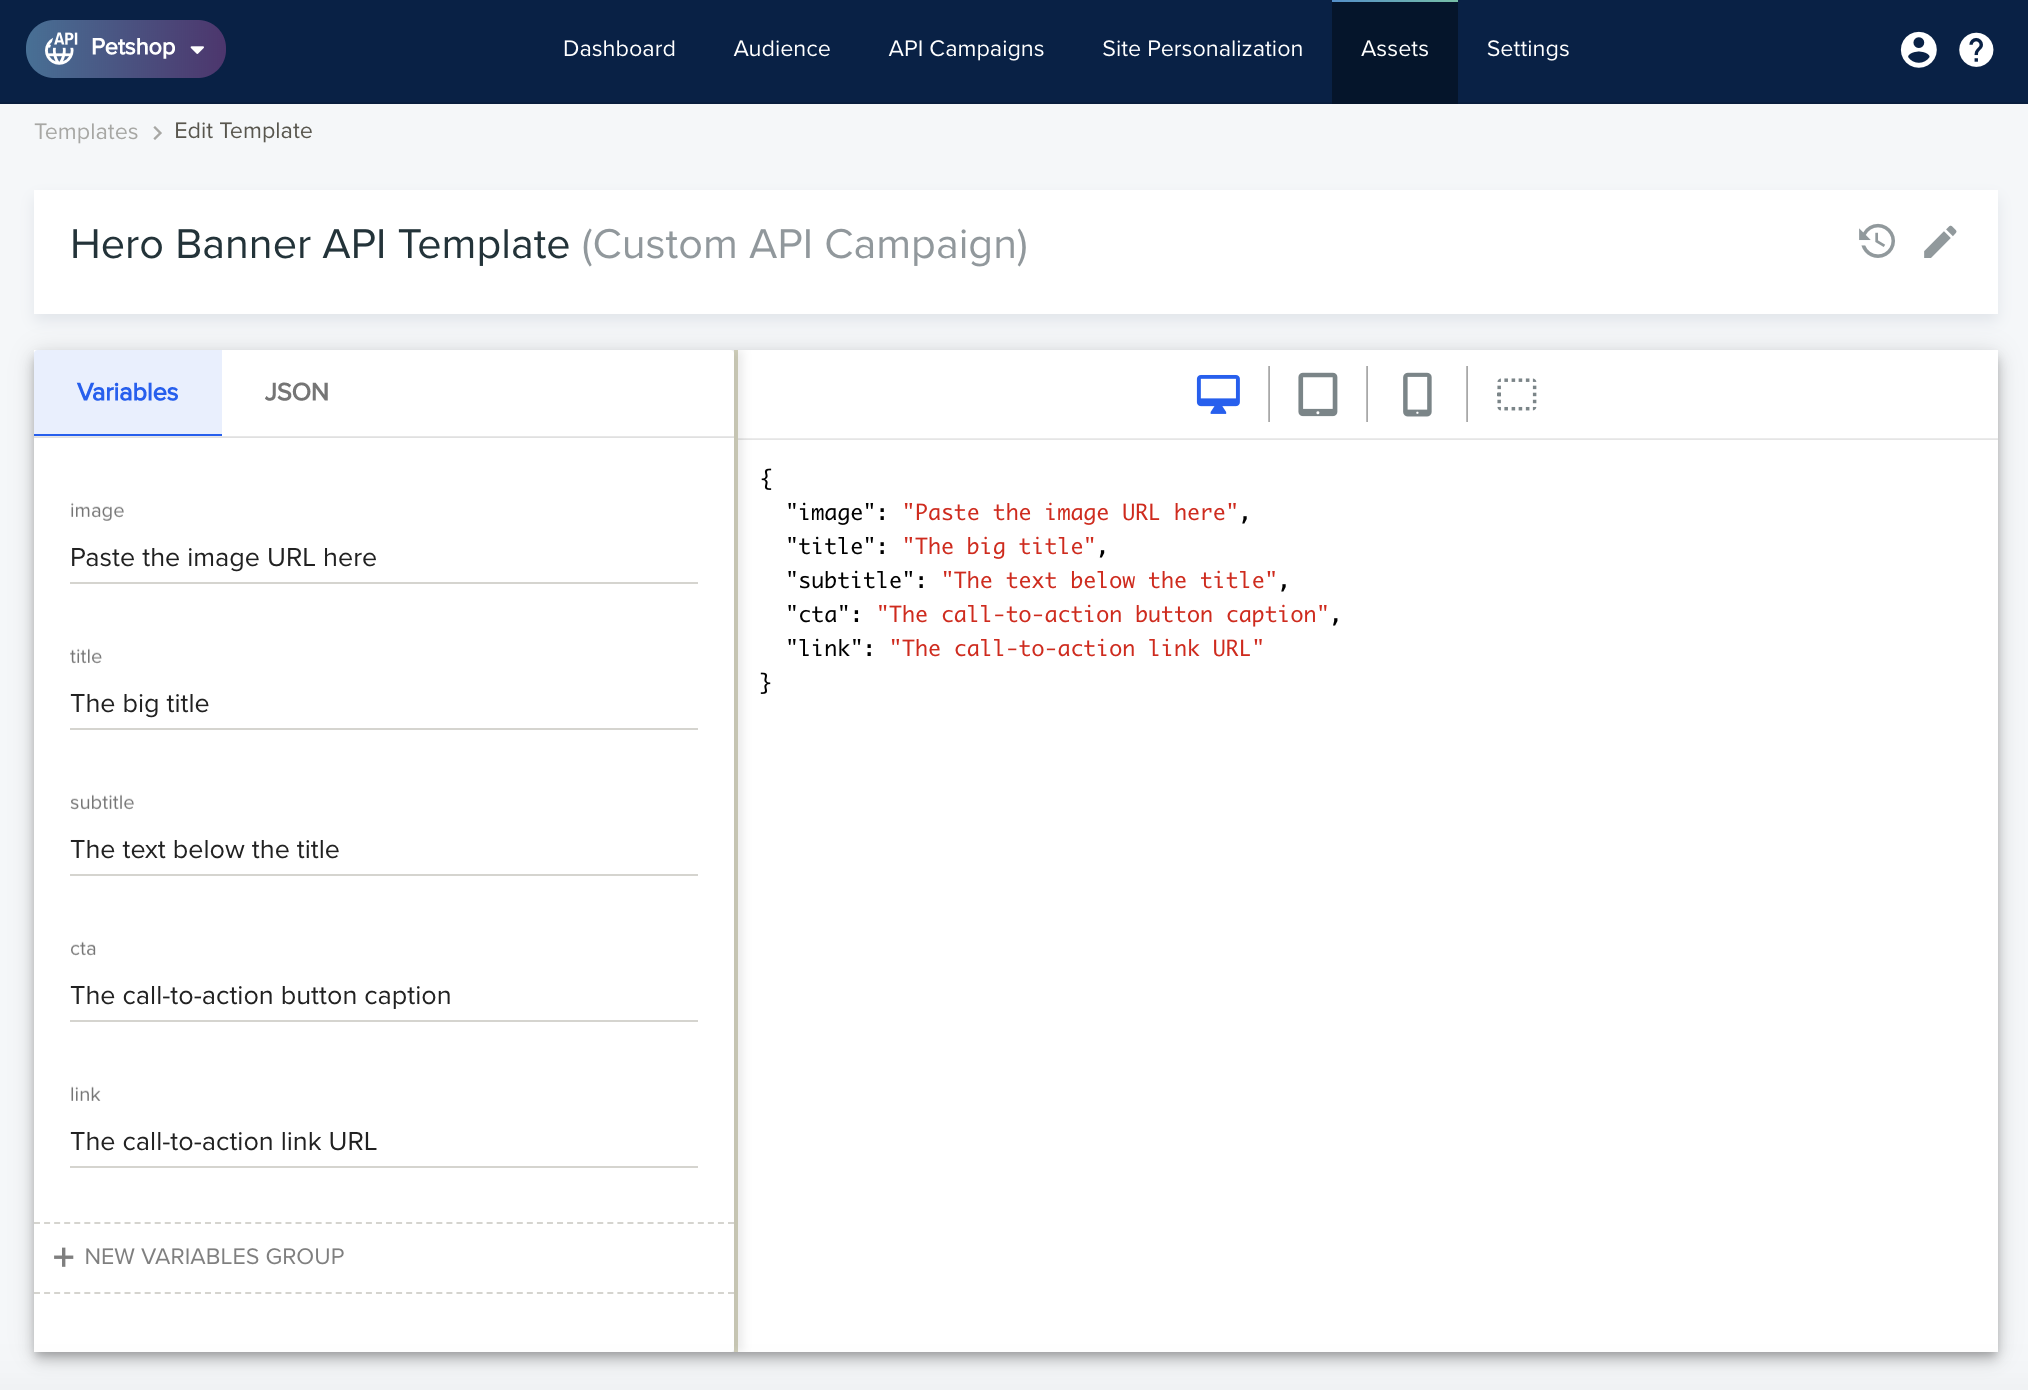
We can now save the template and move on to creating the actual campaign.
Creating the Campaign - Go to API Campaigns and click Add New > Custom.
- Name your campaign HP Hero Banner. You'll see that same name also set as default in the API Selector Name field below. The API Selector Name is the stable technical identifier that you will use for referencing campaigns with API, while the Name attribute is for display purposes only - and can change at any time without breaking the code.
- Click Next, taking you into your first experience. For now, we will not define any targeting, so let's name our experience Default Experience and leave the targeting as is: All users.
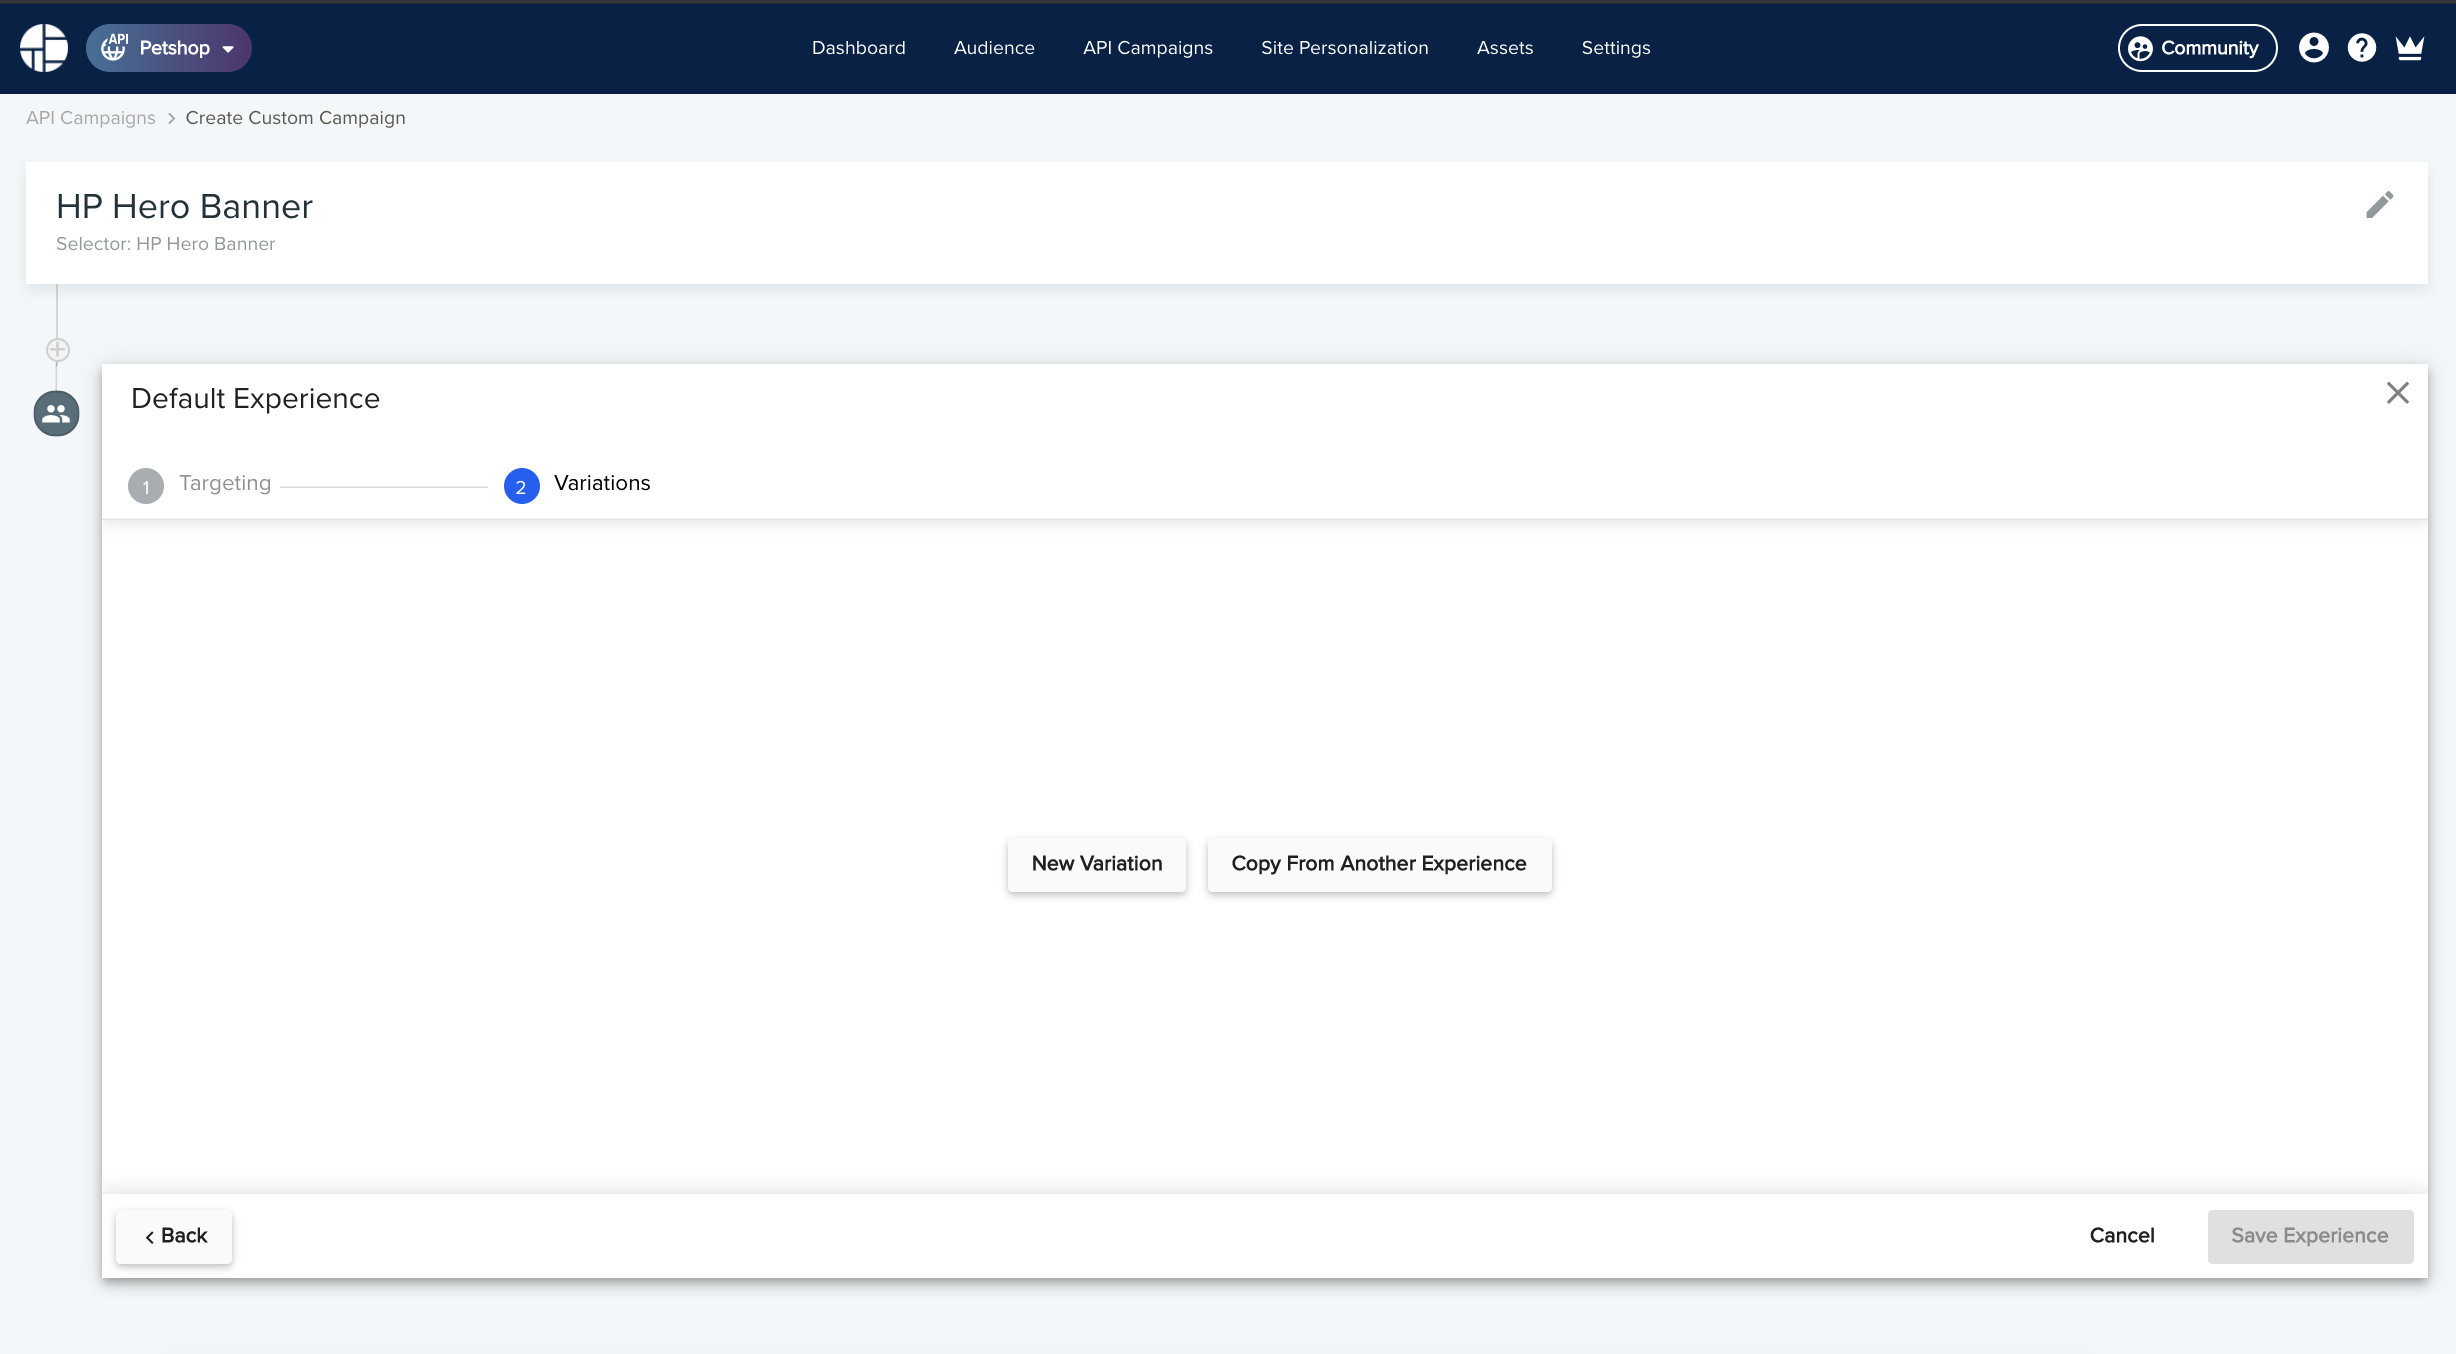
- Click Next again to proceed from the Targeting step to the Variations step.
Here is where you should now arrive:
Creating the First Variation
Note: You can create variations using this method, or using variations feeds.
Based on this template, we will add two variations to the test: one that's just like the default hard-coded one, and one the is a bit edgier than that baseline cute-yet-generic banner.
First, create the baseline variation:
-
Click New Variation and choose the template Hero Banner API Template as the basis.
-
Name the variation whatever you'd like. Personally, I've named it Baseline Cute.
-
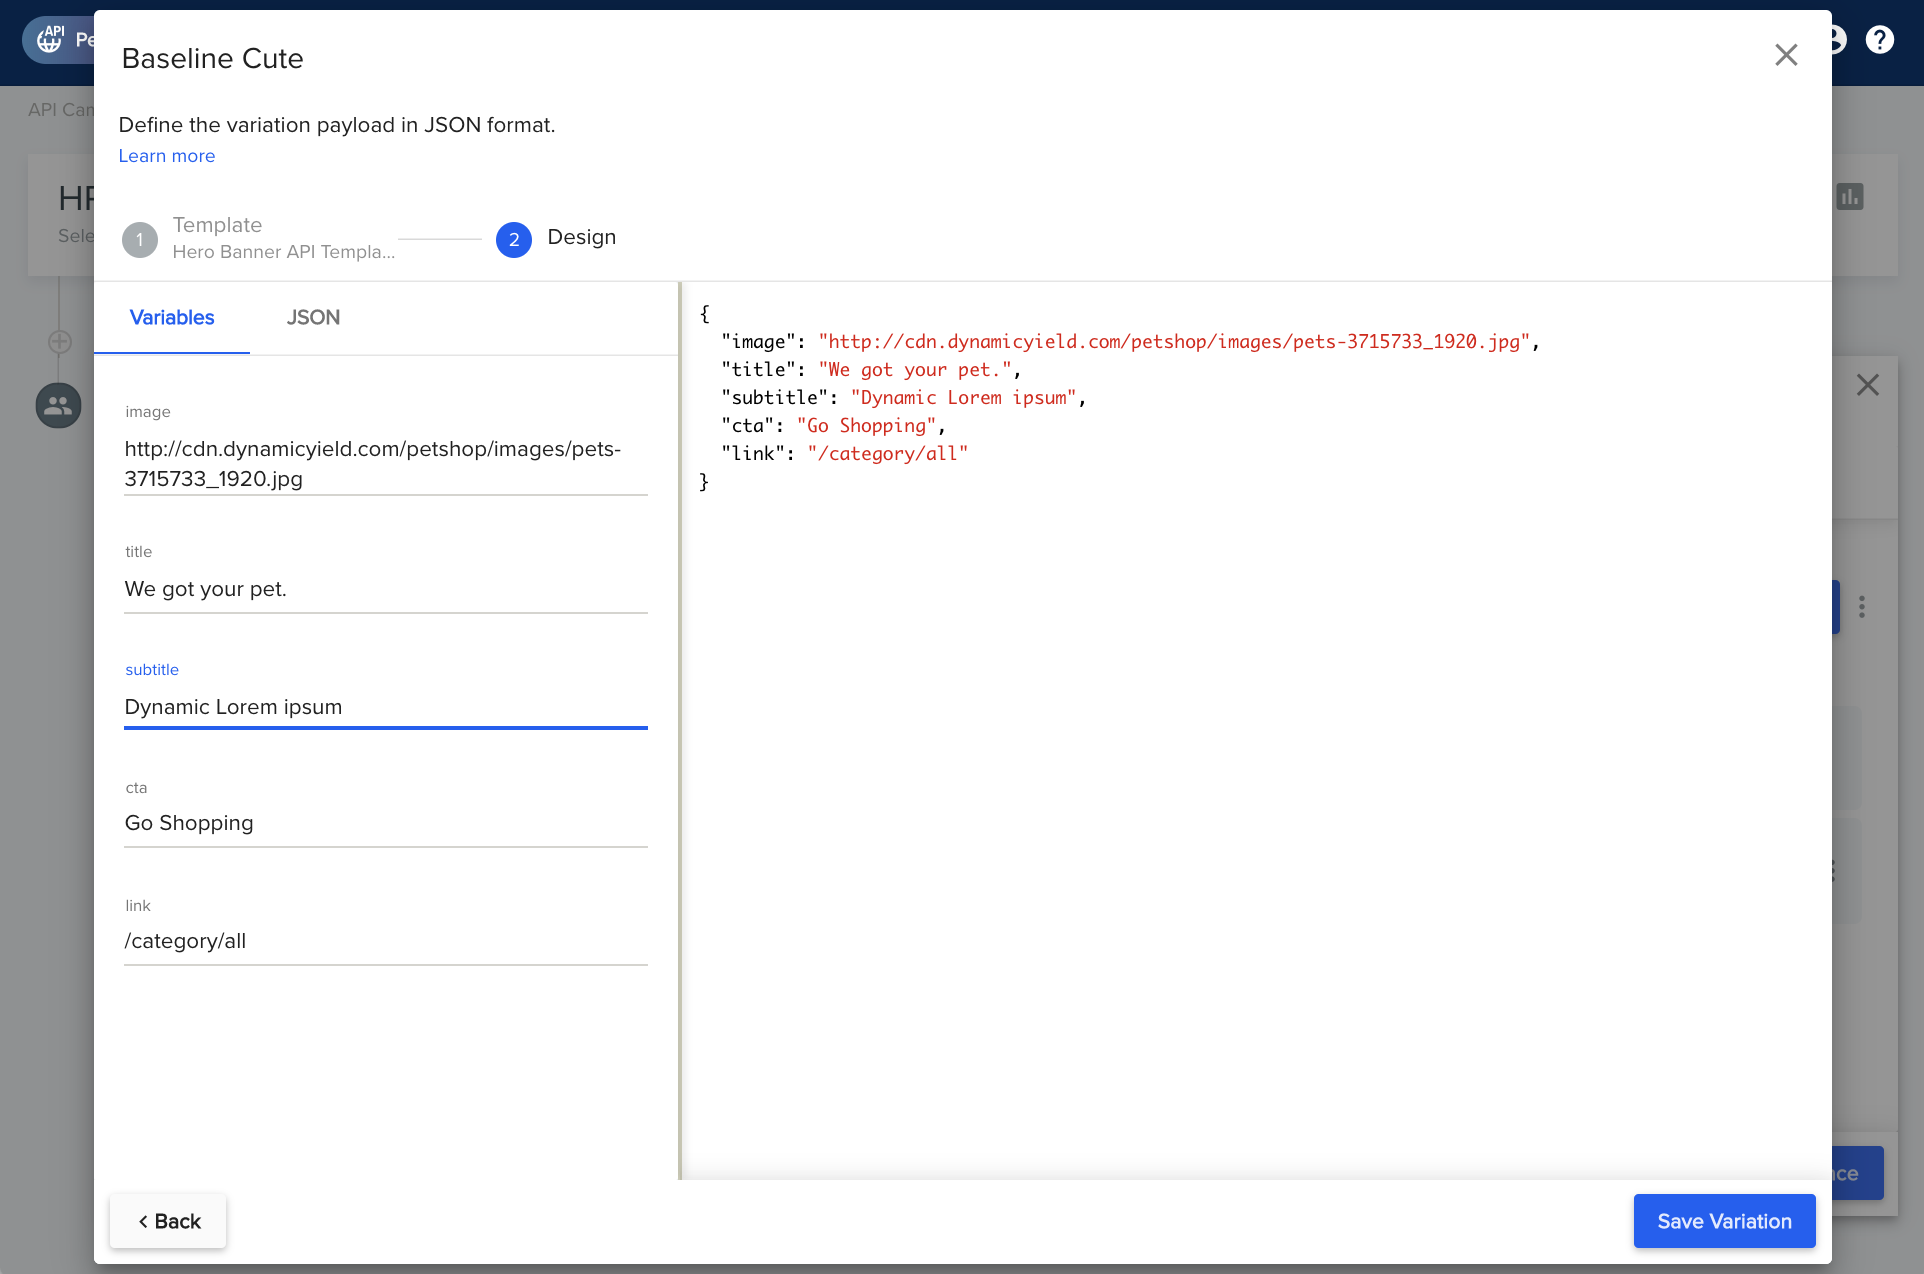
Fill in all the attributes as they are in the hard-coded default in
homepage.js, with one subtle change: in the subtitle variable, I've filled in Dynamic Lorem imsum. This is so we can later clearly see that our code works and content is served dynamically.
-
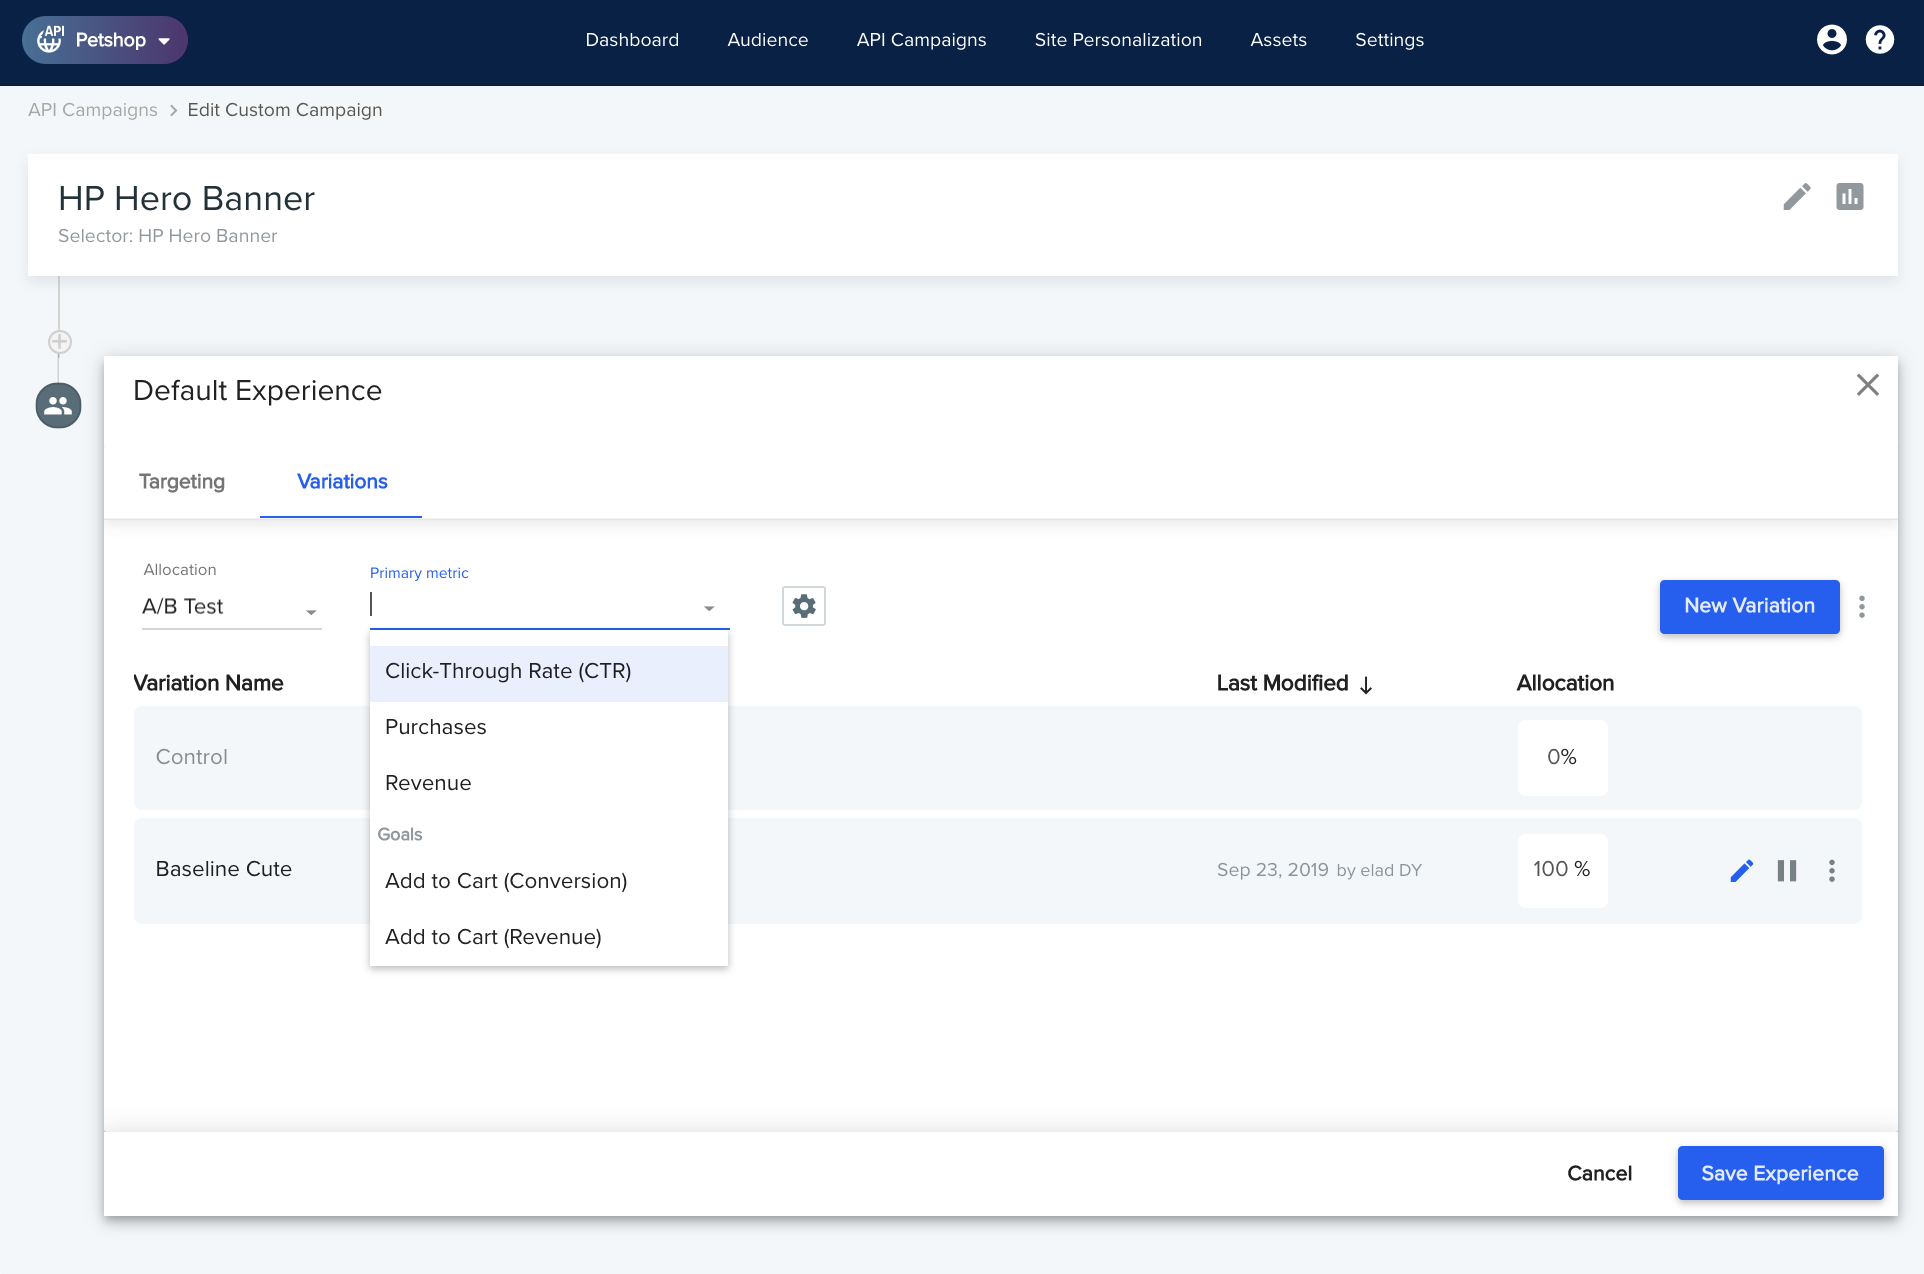
Click Save Variation. This takes you back to the experience level. You should now see the new variation receives 100% of traffic, while the built-in Control receives 0% (to learn more about that, see the bonus reading section at the end of this page).
-
Since the hero banner is as top of funnel as it gets, let's change the Primary Metric to be Click-Through Rate (CTR). This means a simple click on the banner would be counted as a conversion, rather than only having purchases (which are wayyyy down the funnel) as the goal. In fancier words, in this test we're optimizing for engagement rather than revenue.
-
Click Save Experience and then Save & Publish to save the campaign and get back to the list of all API campaigns, which now holds a whopping one campaign.
Next to the campaign name, you'll notice a flashing green "upload" icon, which means your latest changes are being propagated to all relevant servers. When that is done, the icon turns solid blue.
Calling the Campaign via the API
Go back to the homepage.js.
It's time to slightly change the function getPageContent(), so that the call to DYAPI.choose() will now ask for a chosen variation for the 'HP Hero Banner' campaign:
async function getPageContent(req) {
  /* Modify our call to choose in this line: */
  const apiResponse = await DYAPI.choose(req.userId, req.sessionId, req.dyContext,
                                    ['HP Hero Banner']);
  const content = { // ...rest of code
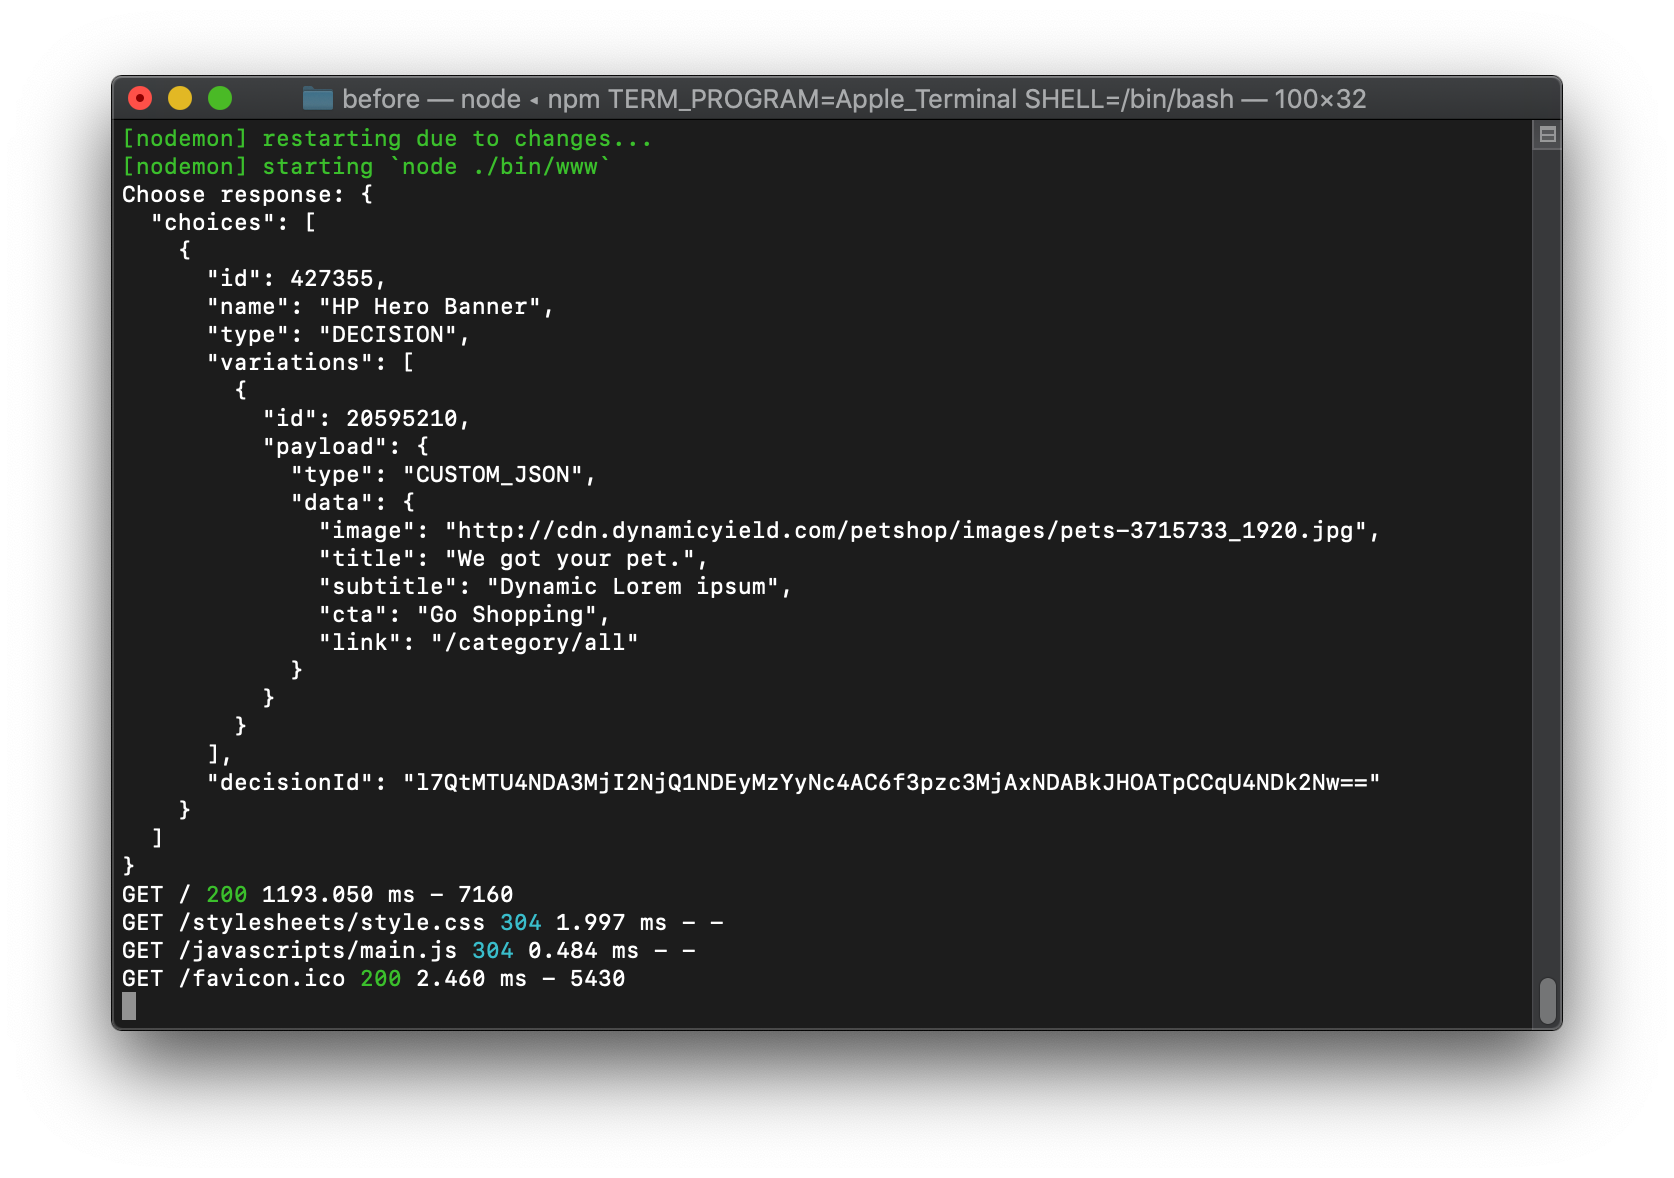
Refresh the Petshop homepage in the browser, and you should see a log line similar to the below in your terminal window. This output is coming from DYAPI.choose() logging to the console - here's our Dynamic Lorem ipsum in there!
Validating Implementation with the API Logs Screen
As you go through the real implementation of our API in your app, you'll quickly need a way to review that the calls you're making have the right arguments, and that there are no errors or warnings to take care off. After go-live, you may want to ensure that the volume of calls you're making matches what you expect knowing your numbers. Often, you'll find that you simply don't have enough debug logging on your end to figure out exactly when and how things have gone awry. Refer to API Logs.
To support these needs, check out Settings > API Logs in the Admin UI. Here's how it looks like after I've fired the request we've been implementing above: first I had a typo in the campaign name, then fixed it and fired a fully valid request twice:
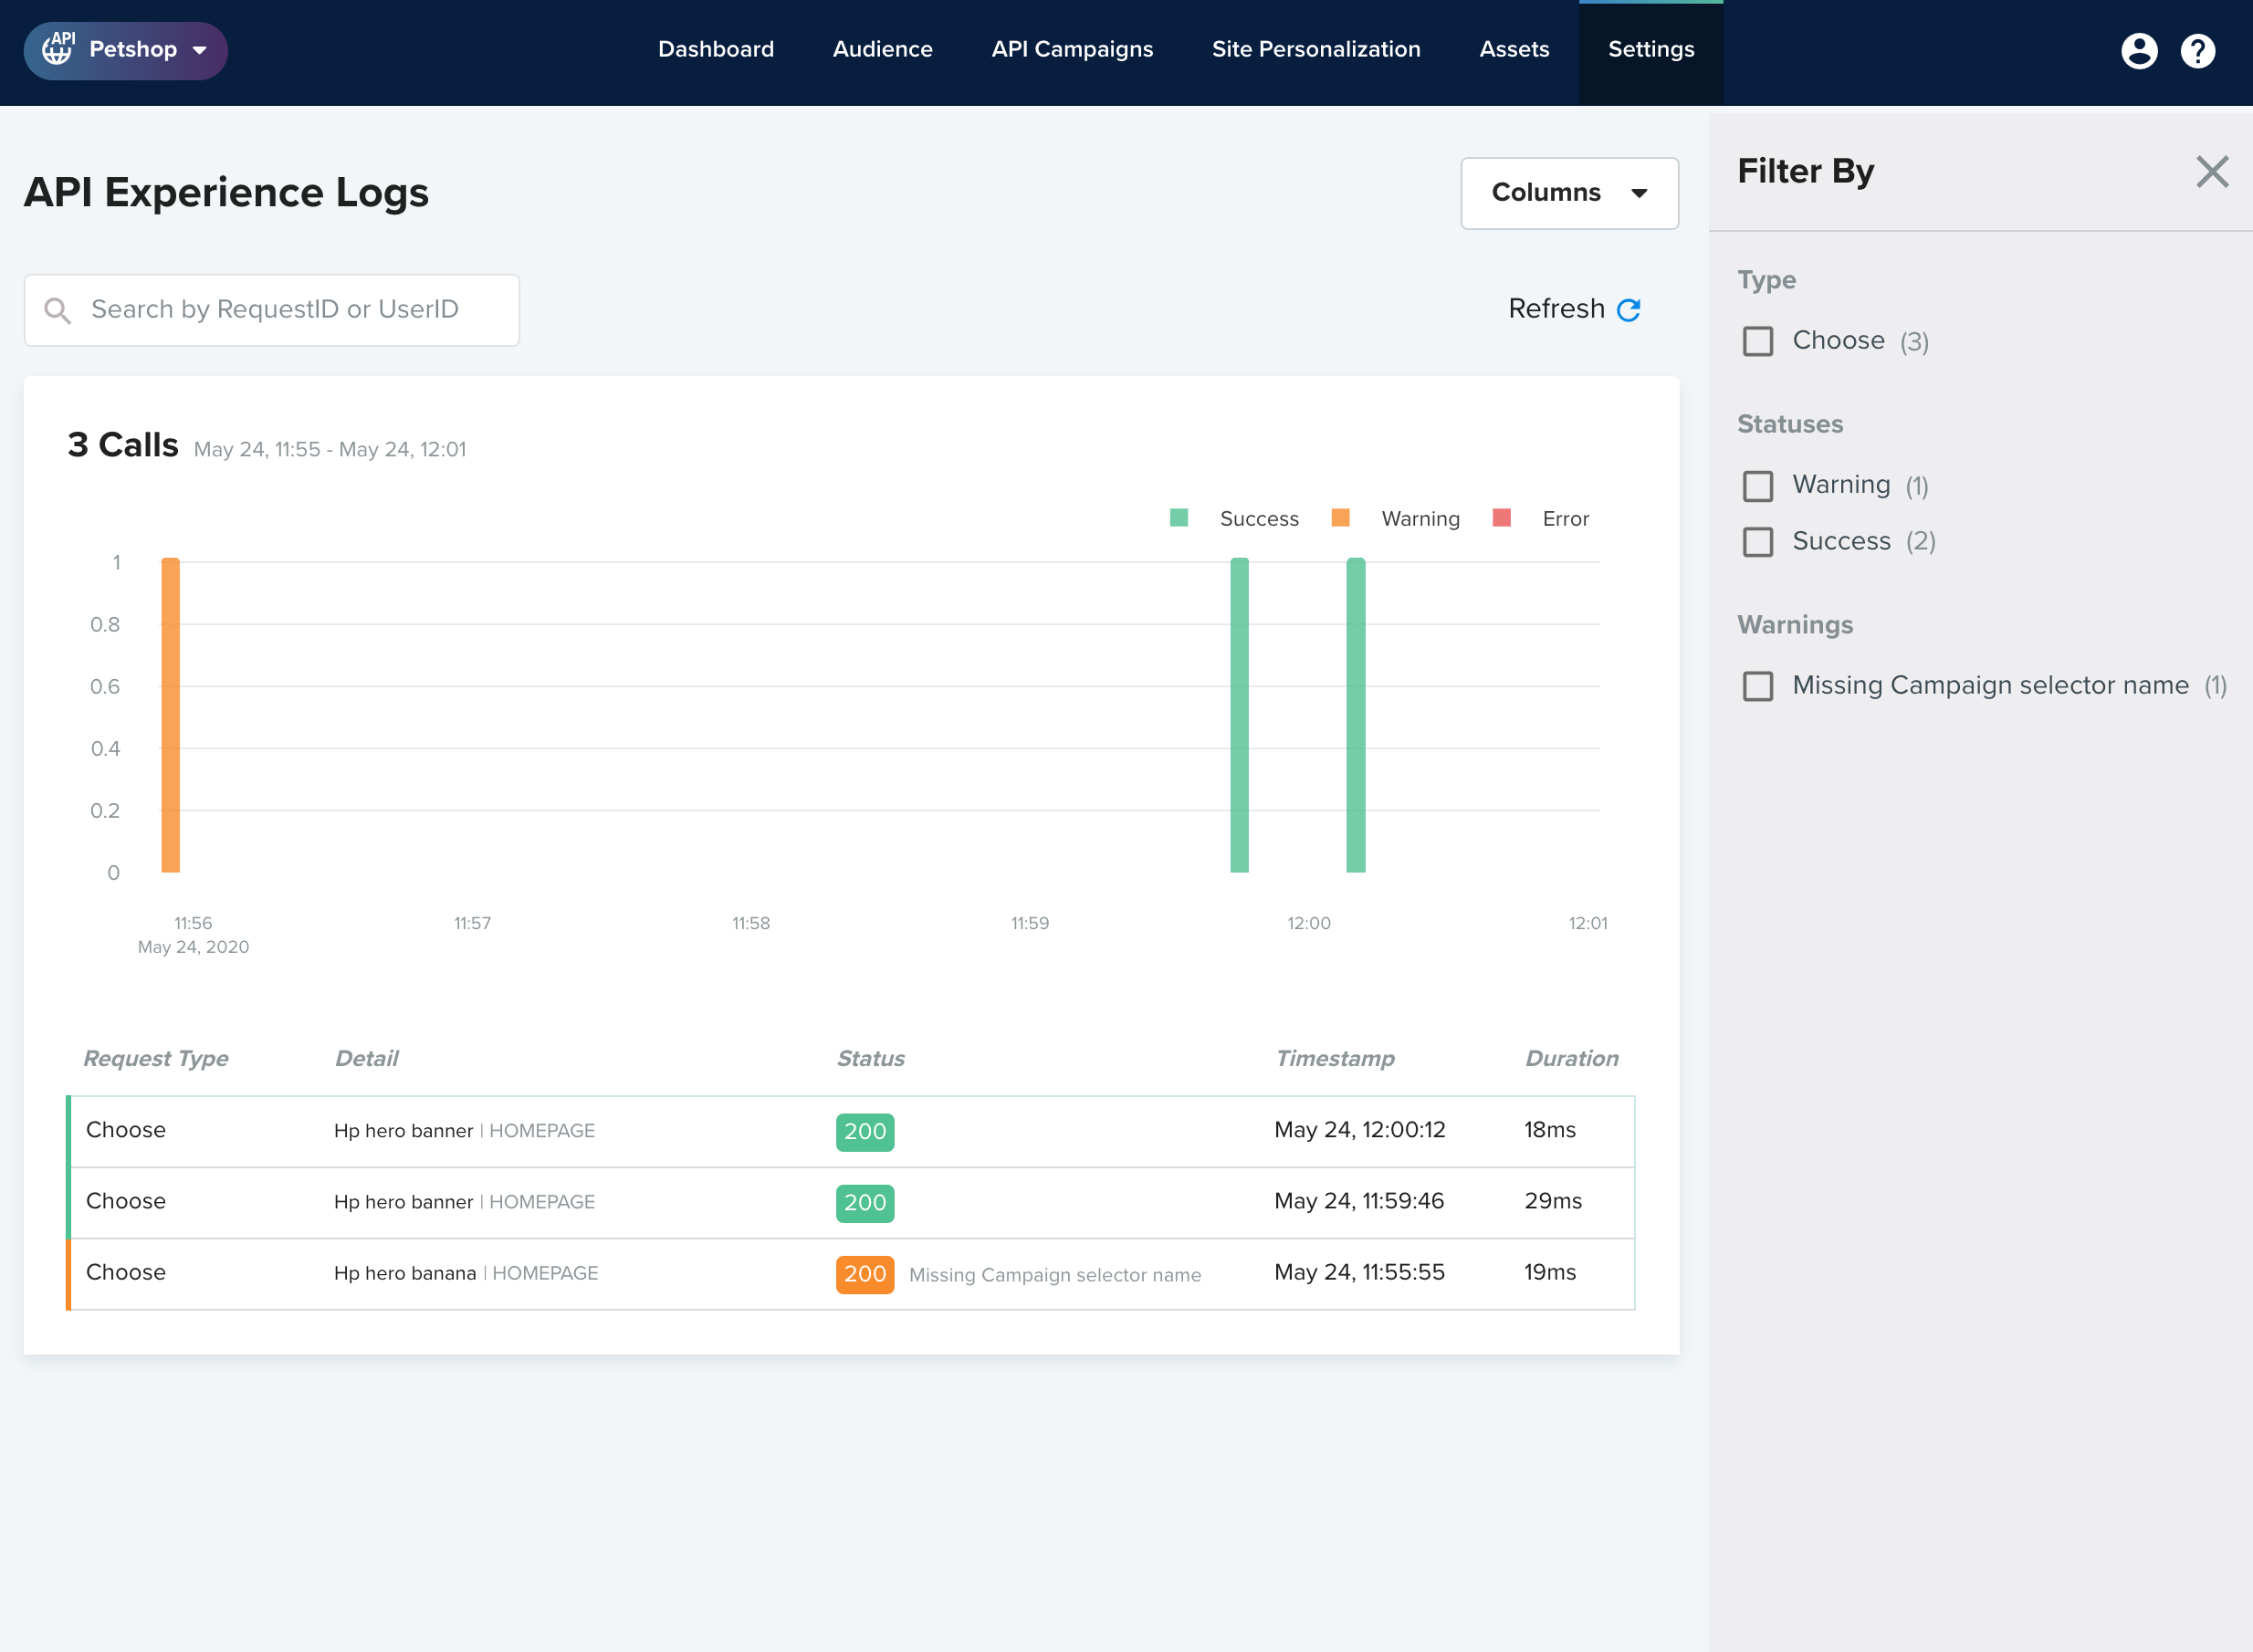
Clicking on any API request in the table would slide in a detailed view of that request, so you can see the full text of any errors or warnings, plus the full body of the request you've made. Logs are kept up to 7 days back.
Simplifying the Output a Bit
This response structure is detailed but pretty verbose, so for the sake of this tutorial let's transform it to a simpler "flattened" hash suited to our needs: given a campaign name as key, directly get the hash of variation attributes. This would be a drop-in replacement to the hard-coded banner parameters.
Head to the implementation of DYAPI.choose() and make a few changes: within the choose() method, we're transforming each of the chosen variations in the original response into a new object. Note the call to reduce() which in turns invokes flattenCampaignData() for each element.
/* Modify the code at the end of choose(): */
  let variations = {};
  try {
    const response = await request(options);
    /* Note the changes to these two lines: */
    variations = response.choices.reduce(flattenCampaignData, {});
    console.log(`Choices by campaign: ${JSON.stringify(variations, null, 2)}`);
  } catch (e) {
    console.error(`ERROR IN CHOOSE: ${e.message}`);
  }
  return variations;
}

/* A newly added function */
function flattenCampaignData(res, choice) {
  res[choice.name] = { decisionId: choice.decisionId, ...choice.variations[0].payload.data };
  return res;
}

module.exports = { // ...
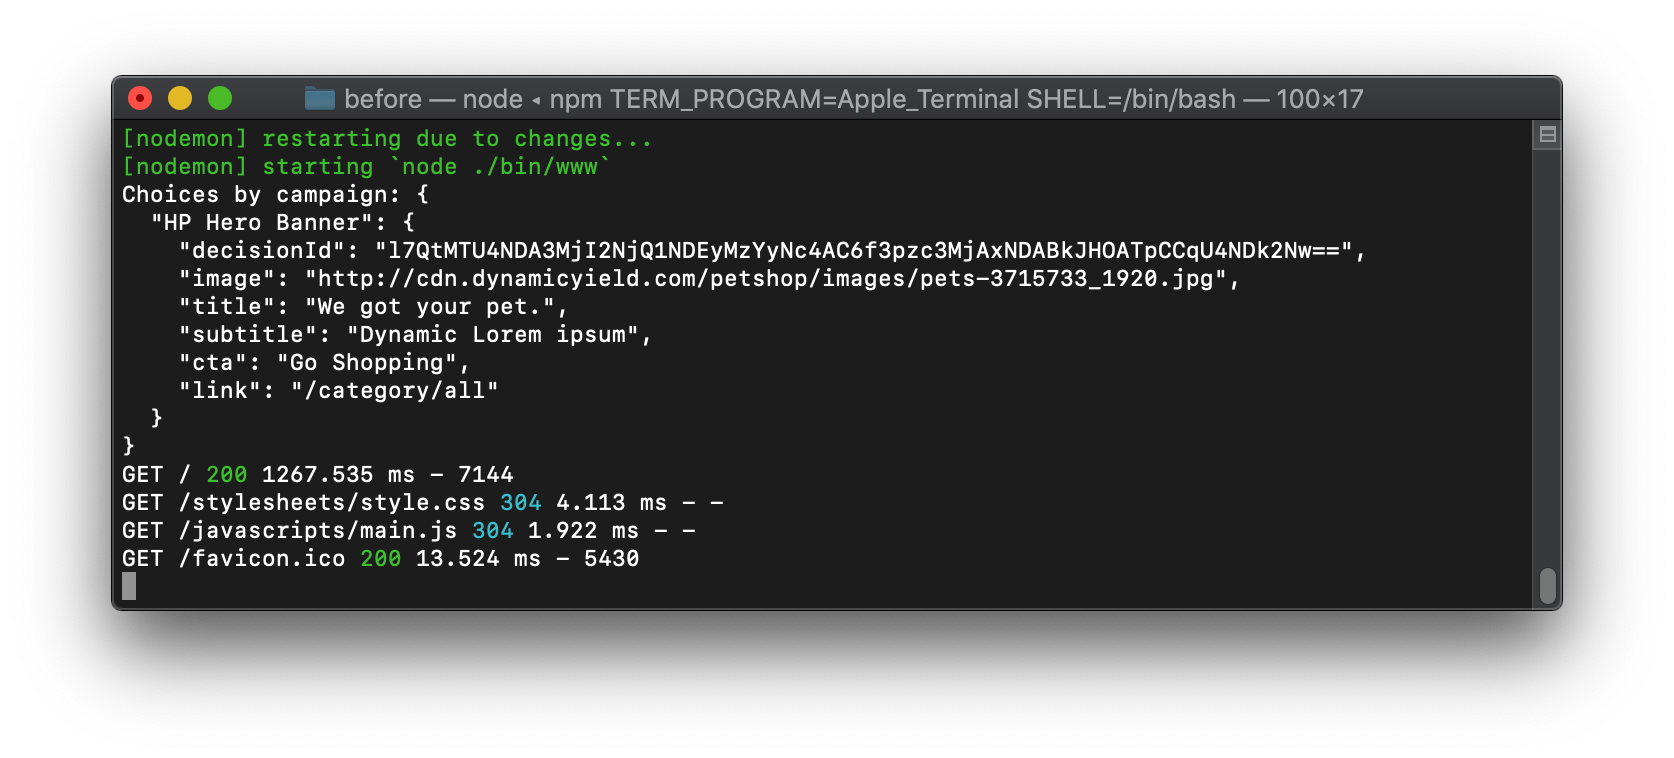
Refreshing the Petshop homepage again, here's what it looks like in the terminal log:
Finally, Putting the Variation to Use
Go back to getPageContent() and modify the code to use the response from Dynamic Yield - or fallback to hard-coded default if there is none for any reason.
async function getPageContent(req) {
  ...
  const content = {
    heroBanner: apiResponse['HP Hero Banner'] || defaultHeroBanner, // <== Here!
    recommendations: defaultRecommendations,
  };
  ...
One more refresh to the homepage, and our new banner subtitle Dynamic Lorem ipsum appears:

Great success! We got a dynamic Lorem Ipsum 😉
Making It a Real A/B Test: Adding Variations
To make this campaign into an honest A/B test, let's add a second variation.
-
Go back to API Campaigns in the Admin UI, and click the edit icon.
-
Instead of creating another variation from scratch, duplicate the existing one: this action is available from the More... drop-down icon to the right of the variation:

Use your imagination to make this new variation your own!
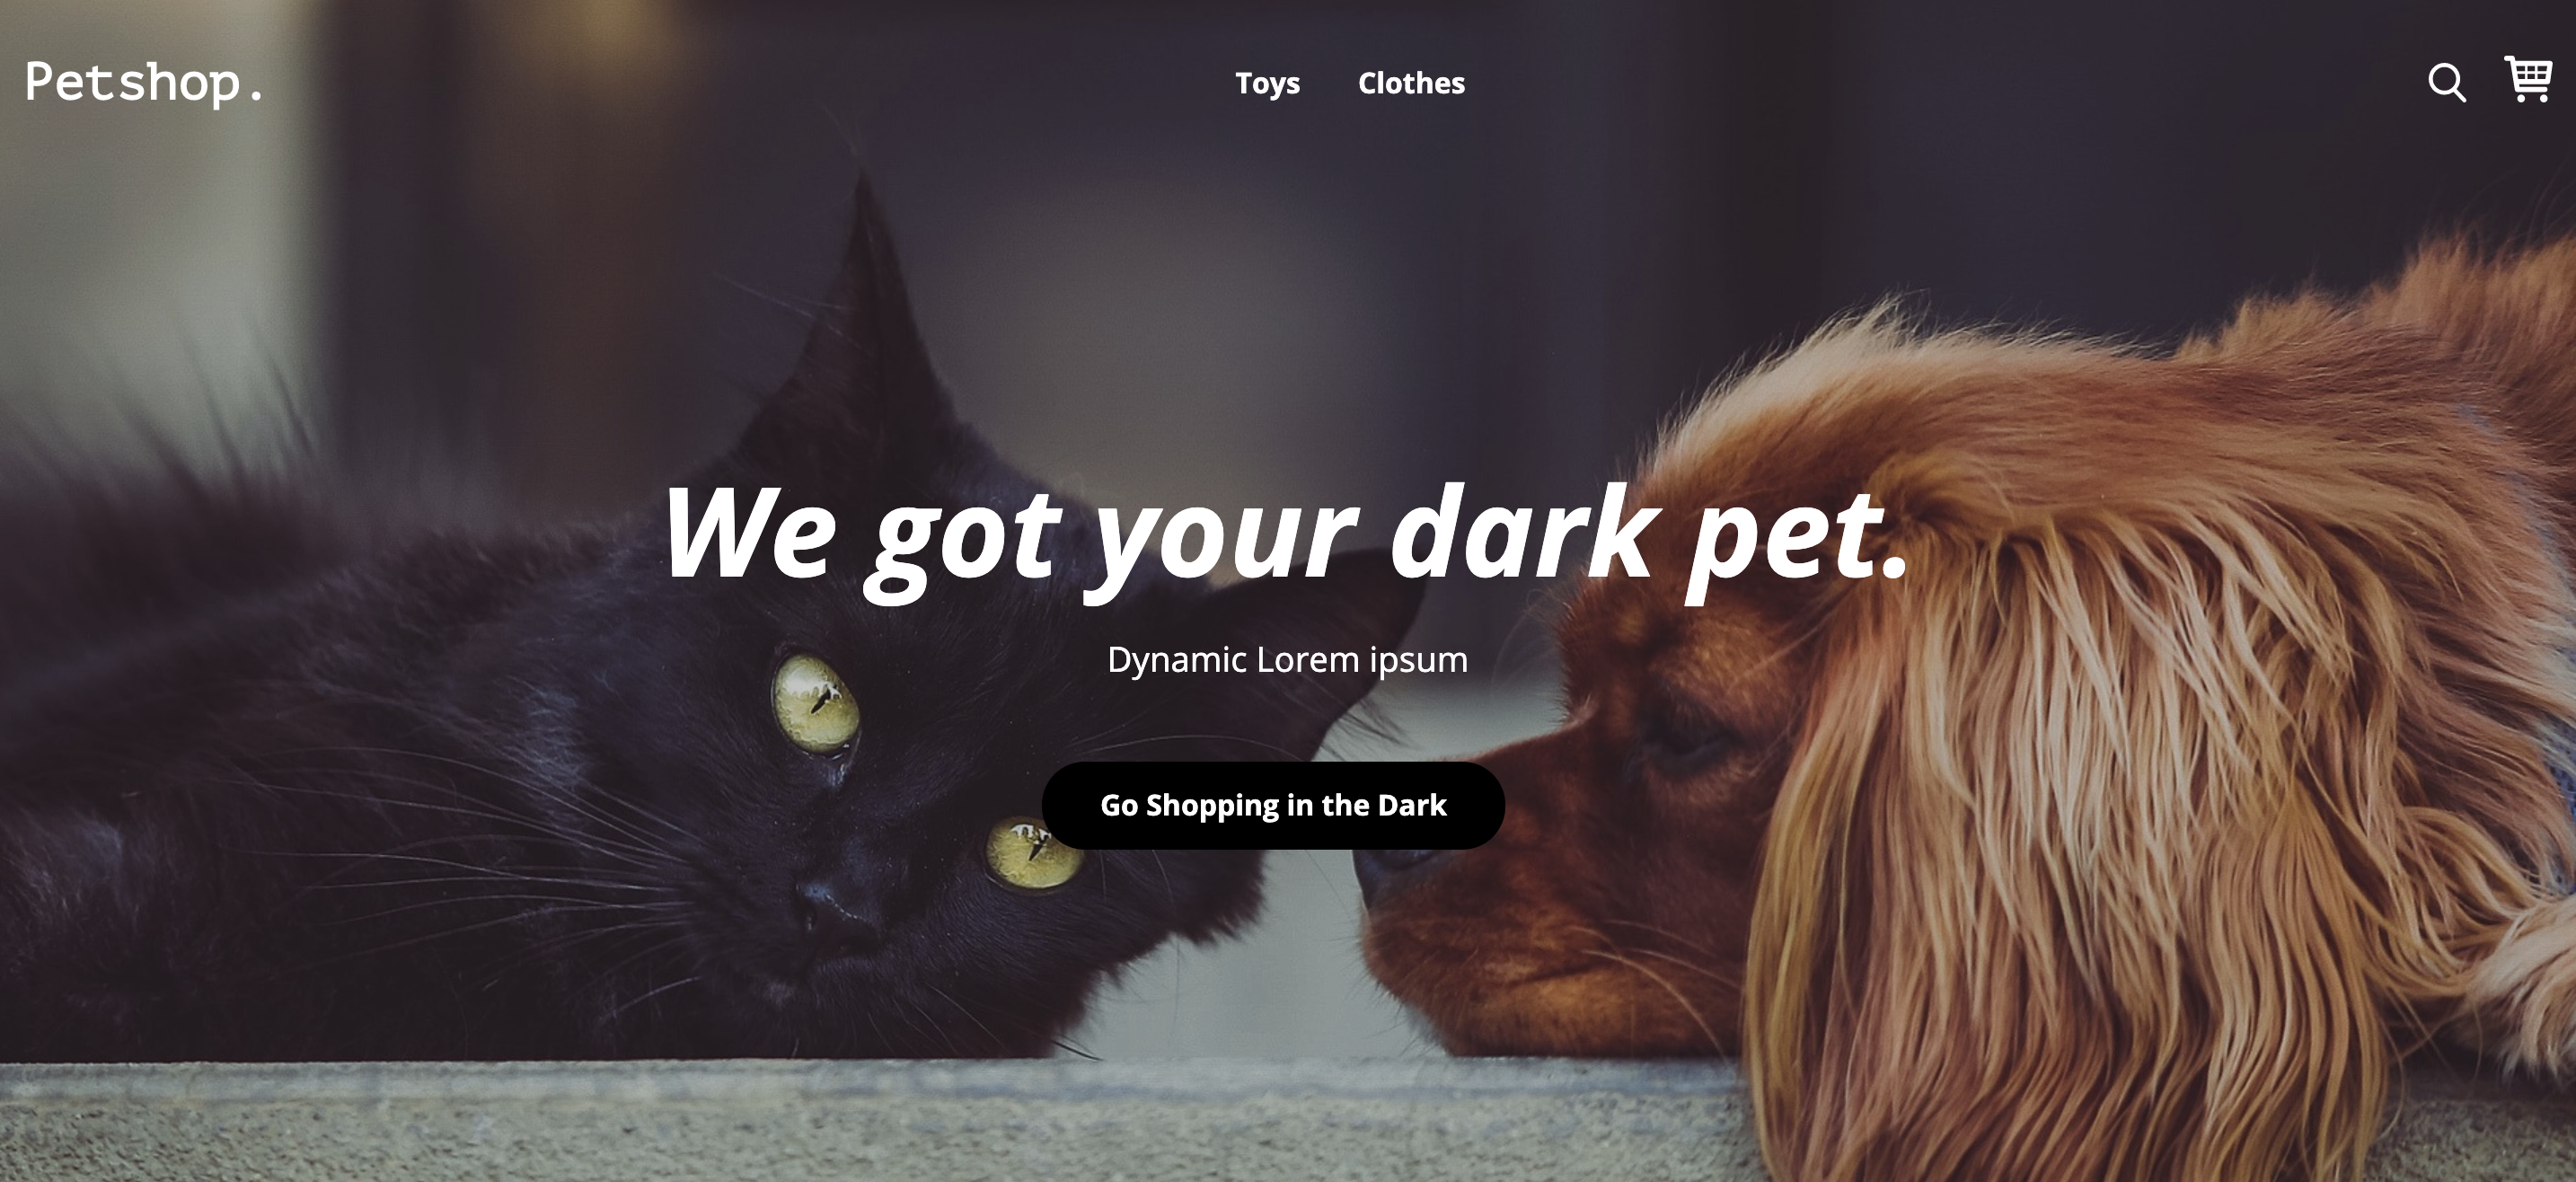
I've called mine Dark Theme and used this background image. The end result of my variation looks like this:
When saving the experience, you will be asked to confirm the creation of a new test version. Go ahead and click Continue.
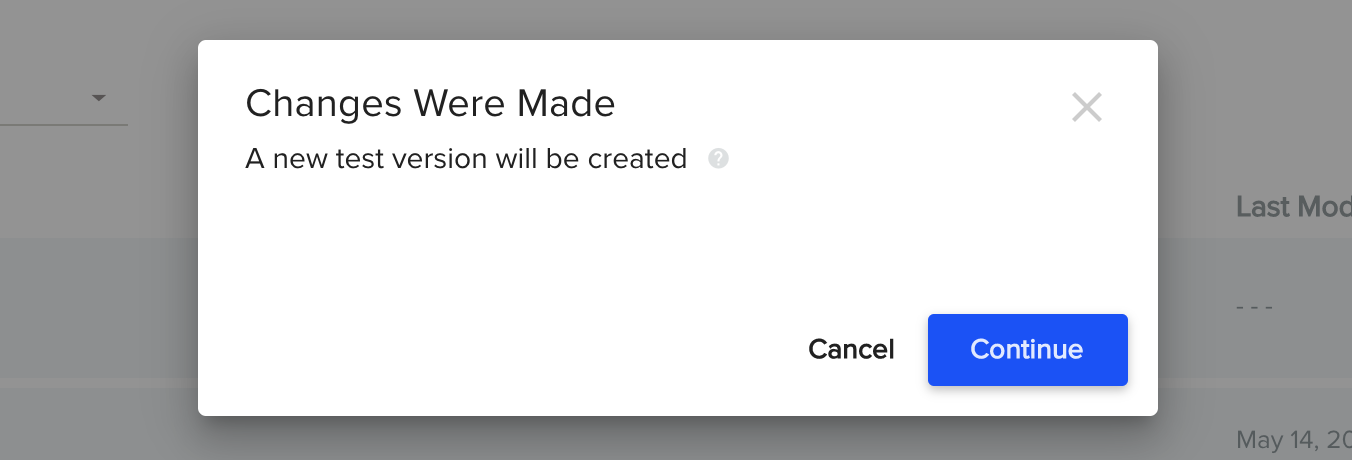
A new version has the effect that any end-users already in the test would be re-assigned a variation, and that data will be collected freshly for this new version (though you can, of course, view the results of past versions). I won’t take deep dive into this topic here, but that new version is crucial for having a valid test: you must have the same mix of users for both the older variation/s and the newly added one.
After publishing the campaign and refreshing the Petshop homepage, you’ll see either the first or second variation. However, repeatedly refreshing the page would keep showing that same variation as long as your userId stays the same.
Bonus Reading 1: Why Do I Keep Getting the Same Variation?
This is by design:
Typically, you'll want to ensure that each user sees the same variation for the length of the test (as long as the test version did not change - see the callout above). This setting is configurable, along with various other advanced settings, through the Gear icon at the campaign experience level.
Since each end-user is identified through a long-living cookie, try opening an incognito window and load the Petshop homepage there. If you close that window and re-open the page in a new incognito window a few times, you'll see that both variations gets their time to shine.
Bonus Reading 2: Understanding the Built-In 'Control' Variation
If the control is set to a non-zero percentage of traffic, and an end-user receives that variation, Dynamic Yield will return no content. The caller of the API is expected to then fall back to the baseline behavior: whether it's simply doing nothing, rendering a hard-coded default, or anything else. This makes a lot of sense when the baseline is an existing piece of logic you want to compare with something new.
Our Hero Banner campaign here could be set up in two ways:
-
Manage all variations in Dynamic Yield, and leave the control being zero, or -
-
Allocate some percentage to the control. If it gets selected, fallback to the default hard-coded version. In Dynamic Yield UI, manage the alternate variation/s only.
In campaigns like the one we're building now, it's usually better to have all variations managed through the Admin UI in the same way - letting your business team control them all under the same roof.
The Next Step
We did not yet report any clicks on the banner. Let's get right to it.
Updated 23 days ago